


Grave of Venom – Dungeon Guide
Grave of Venom is the very first Gear Dungeon you will encounter in Dragonheir: Silent Gods, and it’s one you will become very familiar with by the end of your first season due to the fact that it is the main source of all damage-focussed gear sets.
In this guide we will aim to tackle any questions you might have and help you to be able to clear this dungeon to the highest stage, of course, this will be impacted by your heroes levels, so ensure they are at the maximum level that you can currently reach for the best chances of success!
With each new Season of Dragonheir, the bosses receive some tweaks to how they work, the base of this guide will focus on Season 1 Grave of Venom to cover the basics, and we will then cover the Season 2 and Season 3 variants towards the end of the article.
Rewards:
As mentioned above, this dungeon is all about damage gear, and who doesn’t want their heroes to hit harder? It’s fair to say that outside of Goblin’s Lair where we farm up the experience to level our heroes, we spend a lot of time killing this poor Harpy.
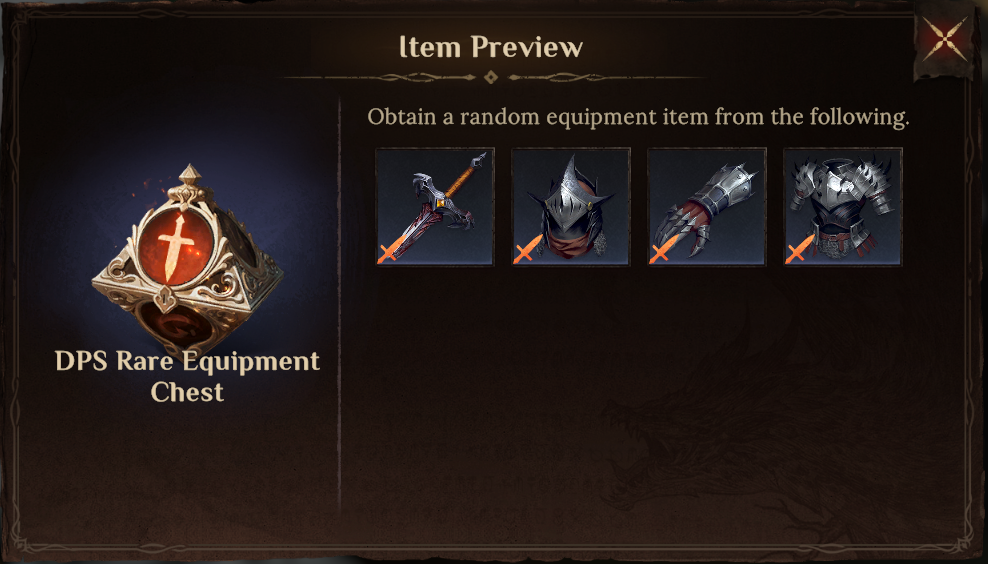
There are 4 rarity tiers of gear that drops in the Grave of Venom, Rare, Epic, Legendary, and finally – Mythical.
Rare Gear: Stages 1-6
The rare gear in Dragonheir is a 2-piece set bonus, that awards you with +15% ATK, you can equip 4 of these items to get a total of 30% ATK bonus.
Epic Gear: Stages 4-12
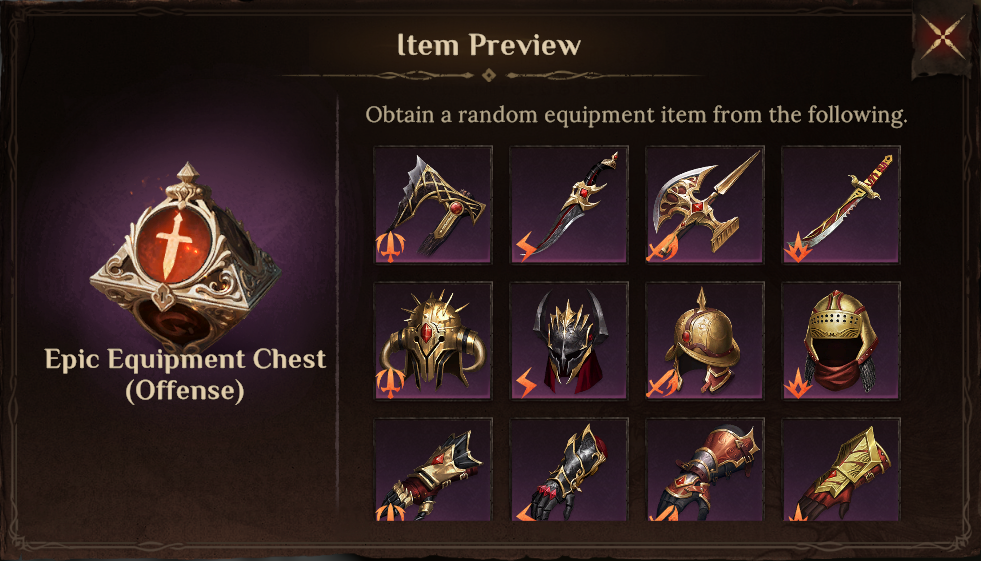
Epic gear you can start to pick up once you get past stage X and it comes in 4 variants, similarly to rare gear these are also 2-piece sets.
15% ATK + 30 Enlightenment – Ideal for Derivative Damage Dealers (Poisoners and Heroes like Flora, Ivellios and Schaltar).
15% ATK + 20% Attack Speed – Ideal for Dauntless Damage Dealers, or Shadow in Season 3 onwards.
15% ATK + 20 Skill Haste – Ideal for damage dealers whose skill cooldowns need to be reduced.
15% ATK + 10% Critical Rate – Ideal for the standard damage dealer.
Legendary Gear: Stages 7-12
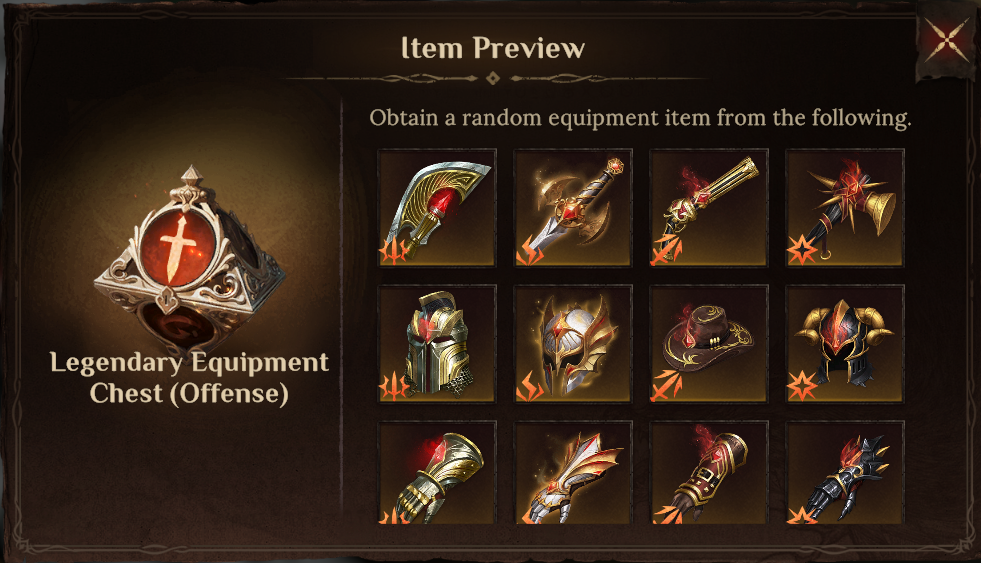
Legendary gear is where things begin to get interesting, they are no longer simply 2-piece sets, but instead have a third bonus at 3/3 pieces, which makes our builds significantly stronger.
There are 4 different sets available, just like in the Epic Gear, which change up with every season.
Season 1:
- 15% ATK + 30 Enlightenment (2pc)
When the wearer’s ultimate skill is fully recharged, they gain a 30% Damage Bonus for 10.0s. (3pc). - 15% ATK + 20% Attack Speed (2pc)
When the wearer deals damage, they have a 30% chance to deal [+5% Target’s Current HP] True Damage (up to 200% of the wearer’s attack). Derivative Damage won’t trigger this effect. (3pc). - 15% ATK + 20 Skill Haste (2pc)
The wearer gains healing by [+40% Attack] when launching a basic attack. (3pc). - 15% ATK + 10% Critical Rate (2pc)
Damage dealt by the wearer ignores 18% of the enemy’s Defense. (3pc).
Season 2:
- 15% ATK + 30 Enlightenment (2pc)
Derivative Damage dealt by the wearer ignores 20% of the enemy’s Defense. (3pc). - 15% ATK + 20% Attack Speed (2pc)
When the wearer deals damage, they have a 30% chance to deal [+5% Target’s Current HP] True Damage (up to 200% of the wearer’s attack). Derivative Damage won’t trigger this effect. (3pc). - 15% ATK + 20 Skill Haste (2pc)
When the wearer deals damage to an enemy with lower Attack, the current damage will be increased based on the difference value of Attack. When the wearer’s Attack reaches 200% of that of the target, the damage bonus will be increased to the maximum value: 50%. (3pc). - 15% ATK + 10% Critical Rate (2pc)
Every time the wearer casts a battle skill or an ultimate skill, they receive an 8% Damage Bonus for 15.0s, up to 4 times. The duration of each stack of the effect is calculated independently. (3pc).
Season 3:
- 15% ATK + 30 Enlightenment (2pc)
Increases Derivative Damage dealt by the wearer by 20%. (3pc). - 15% ATK + 20% Attack Speed (2pc)
The wearer’s basic attack ignores 20% of the target’s Defense. (3pc). - 15% ATK + 20 Skill Haste (2pc)
When the wearer deals damage to an enemy with lower Attack, the current damage will be increased based on the difference value of Attack. When the wearer’s Attack reaches 200% of that of the target, the damage bonus will be increased to the maximum value: 50%. (3pc). - 15% ATK + 10% Critical Rate (2pc)
The wearer gains an additional 4 Attack for every 1 Crit Damage they have. (3pc).
Mythical Gear: Stages 10-12
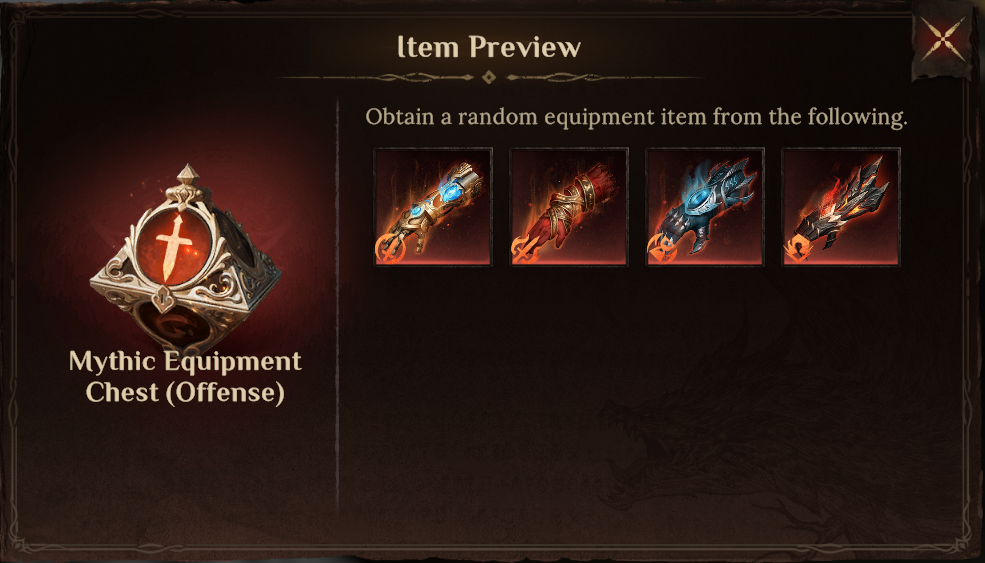
Mythical Gear was a new addition in Season 3, however, it was backdated to be available from Season 1 also, it consists of only Glove-slot items from the Grave of Venom, each with a very powerful 1-piece effect, making them the perfect partner to a Legendary 3pc set.
Energy Harvester:
The wearer obtains 15 attack additionally for every 1 Skill Haste they possess.
Enwinding Flesh:
When any hero dies in the Grand Gladiator Arena, the wearer can obtain 15% of their Attack. The upper limit of additional attack obtained is 300% of the wearer’s Attack.
Chaos Symbiosis:
The wearer deals 35% increased damage, receives 35% increased Ultimate Up effects granted by other allies, but endures 50% decreased Recharging Speed.
Precise Carnage Gauntlets:
The wearer deals 35% increased damage to enemies with Defense Penalty.
Skills:
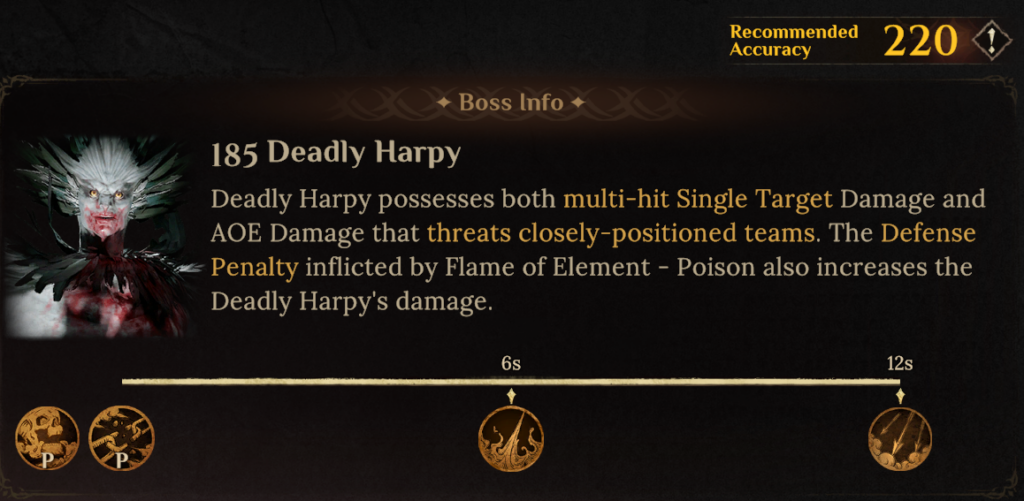
Grave of Venom has 2 active skills for you to worry about, and two passive skills, alongside the boss there are two Flame of Element adds, which each have a different ability that will aid the boss in its attacks.
Shadow Poison [Passive]
Deadly Harpy’s attack has a 60% chance of triggering the assistance of Poisonous Will-o’-the-wisp, whose target always remains the same as Deadly Harpy.
Control Immunity [Passive]
Immune to all control effects.
Poisonous Fletching [Battle Skill]
Deals Poison Damage to enemies within range.
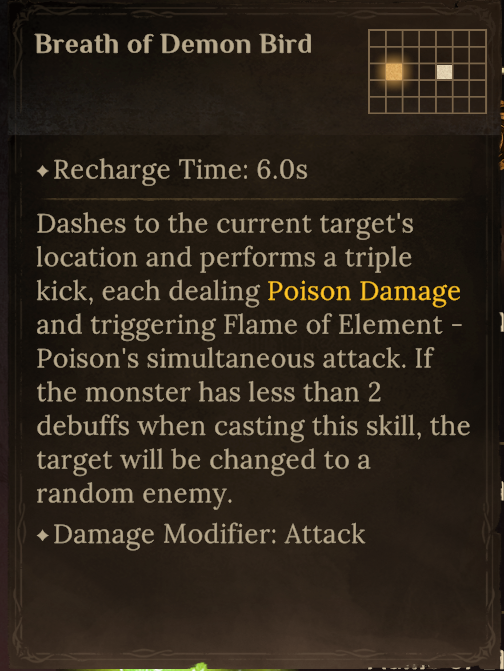
Breath of Demon Bird [Ultimate Skill]
Dashes to the current target’s location and performs a triple kick, each dealing Poison Damage and triggering Flame of Element – Poison’s simultaneous attack with certainty.
Flame of Element [Boss Adds]
1: Deals Poison Damage to the enemy with the Lowest HP.
2: Deals Poison Damage to the current enemy and inflicts Defense Penalty II for 6.0s.
How to Beat Grave of Venom:
In order to take down the grave of venom there are a few key things you will need, most of all and the priority is a strong Tank; keeping your tank alive is the biggest key to success here.
Along with your tank, you will want 2-3 supports to keep them alive, this need will reduce as you get better gear, better Psychicore, and higher levels.
After your tank and supports, it’s time to bring in some damage, focussing on damage dealers who are able to quickly and efficiently deal with the Flame of Elements, as when they are dead – the boss becomes significantly easier.
Positioning:
The key to Grave of Venom in Season 1 is positioning, you can ensure that only 2 Heroes in your whole lineup will be taking damage, the Tank, and the hero with the lowest HP.
In the picture below, you can see that in this Stage 9 Team, Horrus is leading the line to take the brunt of the damage, whilst next to him is the common hero Merideth, who is purposely built with high Defense, and very low HP – this means that the top Flame of Element will target her.
Heksandra, Meggan and Sigrid are completely safe and will not take damage throughout the fight so long as they do not have less HP than Merideth.
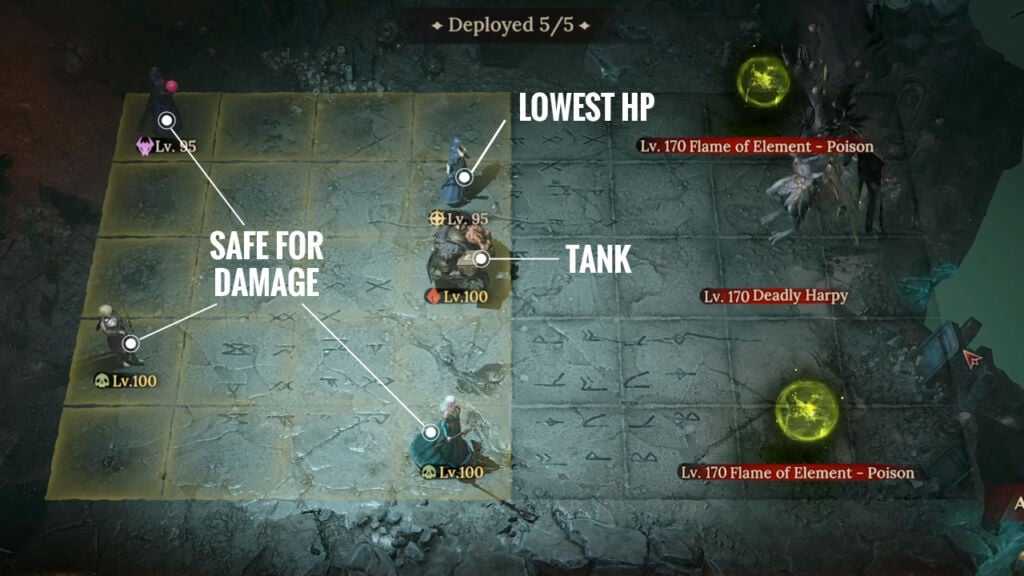
You can see this method displayed in Neva’s video from Season 1 where he uses this team to clear the highest level of Grave of Venom (at the time, this was stage 9 before the stage 12 changes happened).
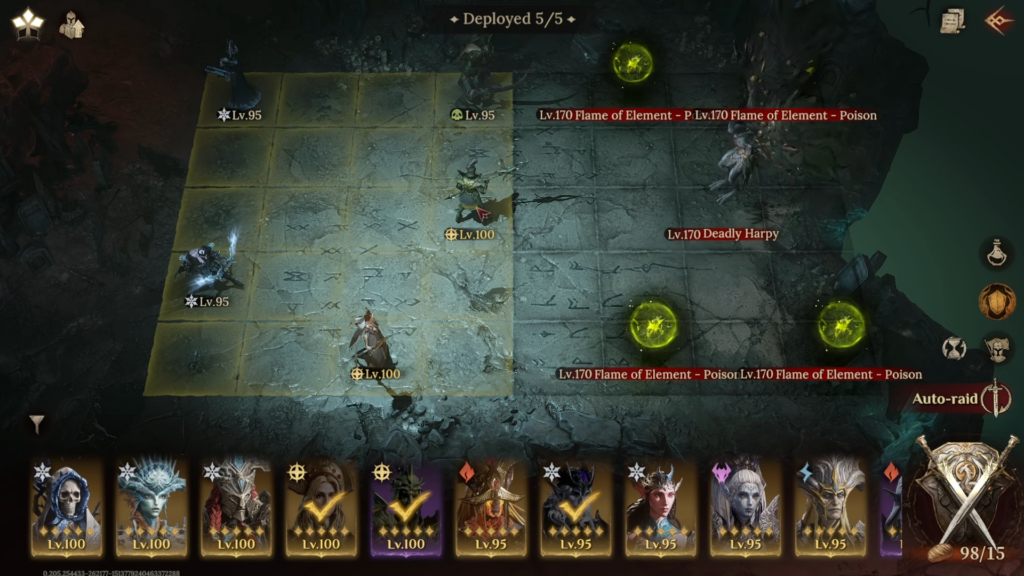
Recommended Heroes:
There are so many viable heroes for this Dungeon, especially when you start to pick up Legendary and Epic Heroes, but there are also many capable Rares and even commons as shown in the team above.
I would consider this team the ultimate F2P-friendly team as it not only uses only Free Champions (Horrus from Login Day 3) but also does not feature the 5x Elemental Bonus.
As we mentioned the Tank is the core of this fight, and there are a couple of very strong alternatives who are epic, being Frurbath and Garius – even the two of them together, or using one of them alongside Horrus will help massively due to the huge healing output they provide.
Tips:
- Attack Penalty will significantly reduce the boss’s damage, where possible you can bring in a hero who is capable of bringing AOE ATK Penalty to help sustain your team, which will also enable Sigrid to hit all 3 targets more frequently.
- The Banner of Oath rare artifact is incredibly strong for any tanks for this fight, providing a large boost of HP and DEF to them, this should be your go-to in the early game.
- Level your tank up to the max level as soon as possible, as we said the key to this is your tank surviving, so giving them the extra stats from being high level as soon as possible will massively boost your progress, they should be your FIRST Level 100!
Season 2 Changes:
The biggest change for Grave of Venom in season 2 was the adjustment to the Flame of Element spawns, they no longer attack the target with the lowest HP, nor place Defense Penalty, however… there are now 4 of them that will just join the boss’s attacks.
Another change that came in Season 2 was the boss gained an extra battle skill, this new skill hits all targets regardless of where they are positioned and dispels 1 debuff from all allies, which can be quite frustrating as the boss will remove your valuable debuffs like ATK Penalty, or DEF Penalty.
The other 2 previous skills from the boss remain unchanged, they will simply repeat every 18 seconds as per the boss’s new rotation, rather than the 12-second rotation we experienced in Season 1 – this makes it much easier to time our skills to repeat every single turn of the boss.
This means that we now to tackle this boss, we do need to consider our team’s survivability slightly more than before when we could run low-level healers at the back due to the fact they would never take damage.
We also need to deal with the extra Flame of Elements to reduce the incoming damage on our tanks, but it is less of an urgency than it was before as they will not be placing Defense Penalty which saw our tanks get melted in Season 1.
Tip for tackling these skill changes:
Using Skill Haste, reduce your important debuffs to 18 seconds cooldown, and set the initial cast to 9 seconds, this will ensure that your debuffs do not get dispelled by the boss and will last until after the boss uses her ultimate skill, allowing you to be covered by ATK Penalty.
Season 3 Changes:
Season 3 brought very few changes to the boss, just the one – when the boss casts her Ultimate Skill; Breath of Demon Bird the boss will target a random enemy instead of the tank UNLESS under 2 or more debuffs.
To deal with this, we refer back to the skill timings that we picked up in Season 2, to prevent our debuffs from being dispelled by the boss, and we ensure that at least 2 debuffs are being placed on the boss to make sure that only the tank is being hit by the ultimate skill else this can, and will kill a weaker target such as your primary DPS.