

RAID: Shadow Legends Proving Grounds Guide – Stages 1, 2 and 3 Explained
The Champion Proving Grounds are now live in RAID: Shadow Legends, and the first three stages give us a much clearer idea of how this new dungeon is meant to be played.
Unlike traditional dungeons, Proving Grounds isn’t just about bringing your five strongest champions. The scoring system heavily rewards specific event and login champions through massive point multipliers, which means team building is just as important as raw power.
For this first live-server run, the focus was on Stages 1, 2 and 3, including the main boss mechanics, useful counters, and practical strategies for securing three stars.
Prioritize Your 9x Champions

The biggest lesson remains the same: Primary Pool champions matter enormously.
The strategy for these early stages was to use as many 9x champions as possible while filling the remaining slots with strong supports who could handle each boss mechanic.
Even partially built champions can be worth bringing purely because of the multiplier.
That means you shouldn’t automatically ignore a weaker champion simply because they aren’t fully booked or geared. If they provide a 9x bonus, they may still contribute more to your score than a much stronger unrestricted champion.
Stage 1: Protect Yourself From Crowd Control

Stage 1 revolves around a dangerous combination of buff stealing, crowd control, and an HP-swapping boss.
The biggest threats include:
- An irresistible AoE Stun from the Force Guardian
- Buff Stealing and Debuff Transferring from the Mirrorer
- Fears from ther Mirrorer
- Provoke from the Mirrorer’s minions
- The Mirrorer swapping HP and extending the fight
The safest counter is Block Debuffs, ideally protected (by using 9-piece Protection set) so it can’t simply be stolen. This will prevent you receiving debuffs from all these sources.
Remove Debuffs is also very useful, particularly on a high-Resistance support.
High Damage is Needed
You will also need high damage output to kill off the minions quickly, and to burst down the Mirrorer before he can swap HP (if you can’t kill him before it comes off cooldown, the fight can extend indefinitely).
Debuffs such as Decrease DEF, Weaken, Poison, HP Burn, and Brimstone can add a ton of damage to your team.
The practical takeaway is simple: keep your team protected from control effects, then focus on damage output before the HP swap can drag the fight out.
Stage 2: Control the Minions

Stage 2 changes the puzzle significantly.
Here, the minions are more annoying than the bosses themselves.
The Protector will Ally Attack your team with its minions, while the Magic Guardian‘s minions will Remove Debuffs from her, allowing her to start stacking Shields and other nasty buffs. If you simply ignore the minions, the fight becomes much harder than it needs to be.
This is where crowd control becomes incredibly valuable.
Best approach
Try to bring options to prevent the minions taking turns, such as:
Stopping the minions from acting will allow you to actually damage the Magic Guardian and to survive The Protector’s Ally Attacks.
Block Buffs and/or Remove Buffs is essential for the Magic Guardian. If she gets stacked with buffs, the fight becomes much slower and she deals massively boosted damage.
Block Debuffs, Healing, Reviving, and any other defensive buffs are useful against the Protector to survive.
After that, follow the same damage steps from Stage 1.
Stage 3: Phantom Shogun Is the Real Threat

Stage 3 pairs Phantom Shogun with Minotaur.
Minotaur Tips
The good news is that Minotaur is relatively straightforward.
His main job is dealing damage after applying Hex. Bringing defensive buffs or healing is all that’s needed her (remove the Hex if you’re really struggling).
After 3 turns he becomes Dazed and takes 200% increased damage. Focus him down while he is Dazed.
Shogun is Much Harder
Phantom Shogun is the bigger problem.
His mechanics include:
- Enfeeble
- Spread Debuffs
- Shade Counter
- Awakened champion interactions
The safest approach is to bring a “C.DMG Tank” who can intentionally absorb his initial Enfeeble (he always targets the highest C.DMG champion on the team).
One clever option is Renegade.
Build her with extremely high C.DMG and make her the preferred target. It doesn’t matter if she becomes Enfeebled because she isn’t there to deal damage. Her job is to absorb the mechanic and reset your team’s cooldowns while your damage dealers focus on the boss.
Use Block Debuffs to prevent the Shogun Spreading Enfeeble and Decrease DEF to your team, or Remove Debuffs immediately after it happens.
On top of this, you will need champions with Awakening levels to deal good damage to him and to keep the Shade Counter low. Never attack him while you are Enfeebled if you can help it, as this will increase his Shade Counter instead.
General Tips for the First Three Stages
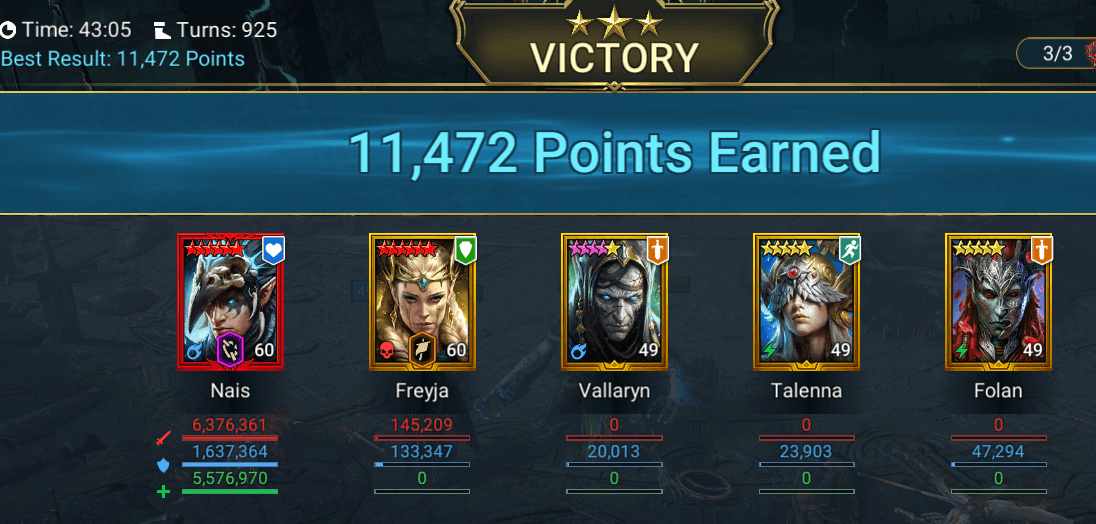
Across all three fights, several things stood out.
The most important tip is to stack as many 9X champions as humanly possible, even if they have no gear, aren’t booked, or aren’t fully levelled.
- Bring Brimstone somewhere in the team. It contributed meaningful boss damage.
- Decrease DEF matters. Without it, some fights become noticeably slower.
- Protection gear is extremely valuable for preserving Block Debuffs and other important buffs.
- Stat requirements are very high, ACC, RES, SPD, etc. are all very high in this dungeon; it’s not easy content.