

Understanding the Ice Golem Hard Mode Mechanics in Raid: Shadow Legends
In this guide, we explore how Hard Mode Ice Golem works in Raid: Shadow Legends. Learn the key mechanics behind the encounter, how the fight changes from Normal difficulty, the best Champion types and strategies for managing his minions, and how to build teams capable of consistently farming Stages 1-10.

What changes from Normal Mode?
Hard Mode changes the way you’ll approach Klyssus, particularly when it comes to dealing damage. Poison strategies that are extremely effective on Normal Mode are no longer viable against the boss, as Klyssus becomes completely immune to Poison. Instead, HP Burn becomes much more important, with its damage increased by 10% and activations providing additional benefits against his minions.
Klyssus also gains an enhanced skill set across Stages 1-10, introducing additional Turn Meter manipulation, debuff removal, and other mechanics you’ll need to account for when building your team. Hard Mode also introduces an Awakening based passive, making your Champions’ Awakening Levels another factor in both the damage you deal and your ability to survive the encounter. Effects such as Smite can provide additional value, which we’ll cover alongside the boss’s mechanics and team building options below.
Hard Mode Artifact Farming
Alongside the increased difficulty, Hard Mode offers better rewards for your Energy. Progressing through Stages 1-10 provides improved chances of obtaining higher rarity Artifacts compared to Normal Mode, while also introducing the possibility of earning Mythical Artifacts. This makes Hard Ice Golem a better farming destination once your account can clear the higher stages consistently.
Understanding The Hard Mode Ice Golem’s Skills
Glacial Eruption
Glacial Eruption attacks all enemies with a straightforward AoE attack. There are no additional effects to manage, but the increased damage of Hard Mode makes Shields, Strengthen, healing, Unkillable, and other forms of protection valuable for keeping your team alive.
Debilitating Frost
Debilitating Frost attacks all enemies, places 50% Decrease ACC for 2 turns, and reduces everyone’s Turn Meter by 30%. Klyssus also removes all debuffs from himself when using the skill, potentially clearing effects you’ve placed to support your strategy.
High RES can help your Champions resist Decrease ACC entirely, while Block Debuffs provides a reliable way to prevent it from landing. Remove Debuffs can also cleanse the effect if it gets through, ensuring your key debuffs remain reliable when setting up against the boss.
Frozen Reckoning (P)
Frozen Reckoning triggers when Klyssus drops below 80%, 60%, 45%, 30%, and 15% HP, immediately attacking your entire team. Any dead minions are revived to full HP, while each surviving minion causes the attack to ignore an additional 50% DEF and increases its chance of placing Freeze by 40%.
Managing or eliminating the minions before crossing these thresholds can make the attack considerably safer. Alternatively, defensive setups using effects such as Block Debuffs and Unkillable can be built to withstand the passive when it triggers. Solo Champions can instead rely on high RES and strong self sustain through sets such as Regeneration, while Block Revive provides another option for permanently removing the minions.
Winter’s Power (P)
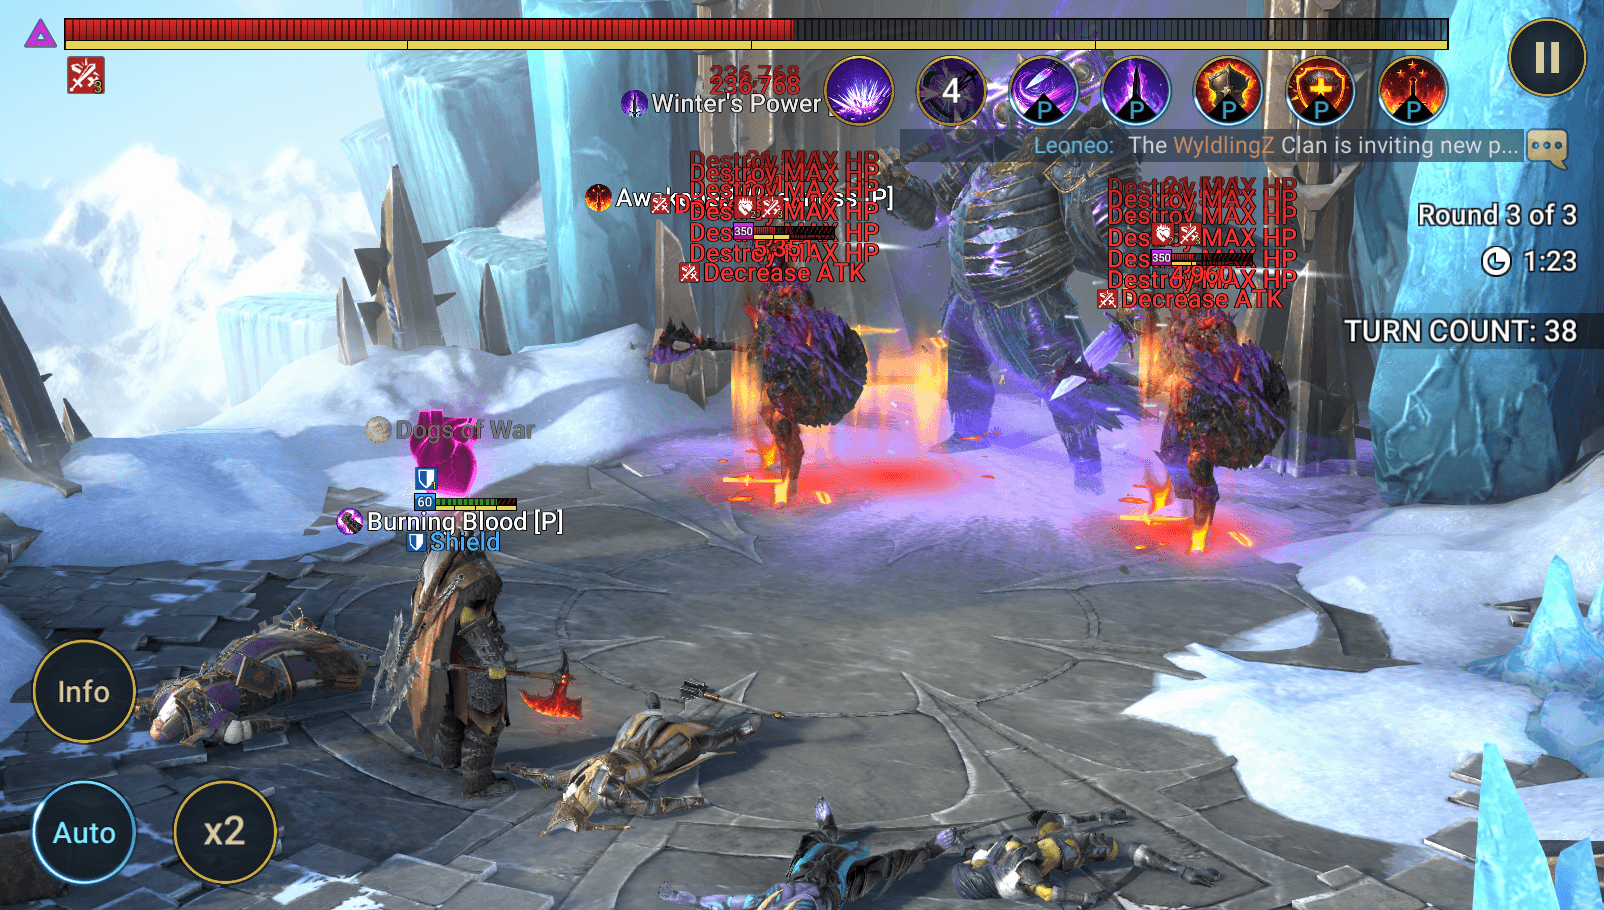
Winter’s Power is one of the biggest changes from Normal Mode. Klyssus is completely immune to Poison and Poison Sensitivity but receives 10% more damage from HP Burn, making Burn one of the strongest effects to build around.
Whenever HP Burn is activated on Klyssus or his minions, 5% of the minions’ MAX HP is destroyed. Activating Smite instead destroys 10%, with destroyed MAX HP capped at 50%. Repeated HP Burn activations can therefore wear down Klyssus while making his minions increasingly easier to eliminate.
Tainted Immunity (P)
Klyssus is immune to most forms of crowd control, including Stun, Freeze, Sleep, Provoke, Fear, and Block Active Skills, alongside HP exchange, HP balancing, and cooldown increasing effects. Focus your setup around effects that remain applicable, particularly HP Burn and the offensive or defensive debuffs needed for your strategy.
Almighty Strength (P)
Enemy MAX HP skills cannot deal more than 10% of Klyssus’s MAX HP per hit. These Champions can still provide strong boss damage, particularly with multi-hit abilities, but each individual hit is restricted by the cap. (Granted you’re set up for surviving the passive retaliation)
Awakened Weakness (P)
Awakening provides both offensive and defensive benefits against Klyssus. Each Awakening Level reduces the damage your Champion receives from the boss while increasing the damage they deal to him, with the benefits becoming significantly stronger at higher Awakening Levels. This makes Awakening increasingly valuable when building consistent Hard Mode teams.
The Waves & Boss Minions
Managing the Minions
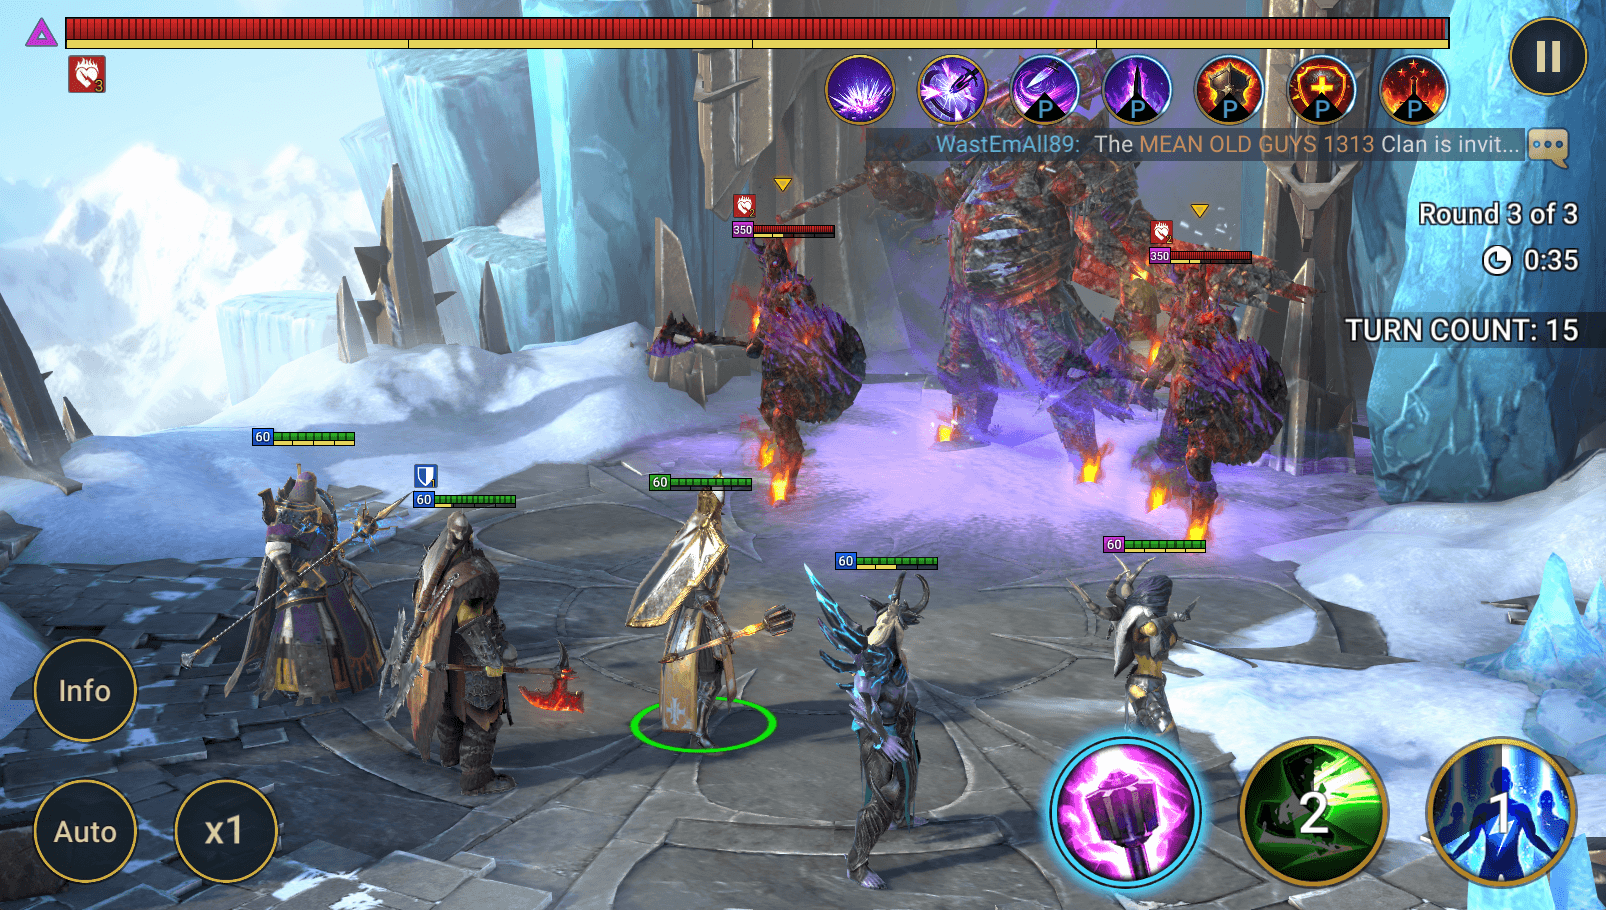
Klyssus still fights alongside two minions, but Hard Mode gives you more reason to consider whether you actually want to eliminate them. If you’re using Block Revive, permanently removing the minions can make Frozen Reckoning much safer and allow you to concentrate entirely on the boss.
If you’re not relying on Block Revive, keeping the minions alive can instead create additional opportunities for HP Burn. Placing and activating HP Burn allows you to wear down Klyssus while also destroying the minions’ MAX HP, making repeated activations increasingly effective. Crowd control can help keep the minions manageable without killing them too early, while activation skills with lower raw damage can reduce the risk of unintentionally pushing Klyssus through a Frozen Reckoning threshold.
Clearing the Waves
Before reaching Klyssus, you’ll still need to clear two waves efficiently. Champions such as Seer can quickly remove these waves before eventually falling during the boss encounter, leaving a dedicated solo Champion such as Artak to finish the fight.
Alternatively, your wave clearer can work alongside the key Champions required for the boss phase, helping wear down the waves before transitioning into your HP Burn and sustain strategy. Just be careful with powerful direct damage dealers once you reach Klyssus, as an attack that pushes him through one of his HP thresholds can trigger Frozen Reckoning at an inconvenient moment.
Building A Hard Mode Ice Golem Team – Key Roles

HP Burn & Activations
HP Burn should form the foundation of many Hard Ice Golem teams, with Klyssus receiving 10% more damage from HP Burn. Activations speed up this damage by triggering Burns instantly rather than relying entirely on enemies taking turns, while also destroying the minions’ MAX HP by 5% per activation.
Repeated activations can bring the minions into range to be finished with Block Revive, permanently removing them before focusing entirely on Klyssus. (Or keeping them alive for more burn activation potential)
Team Protection
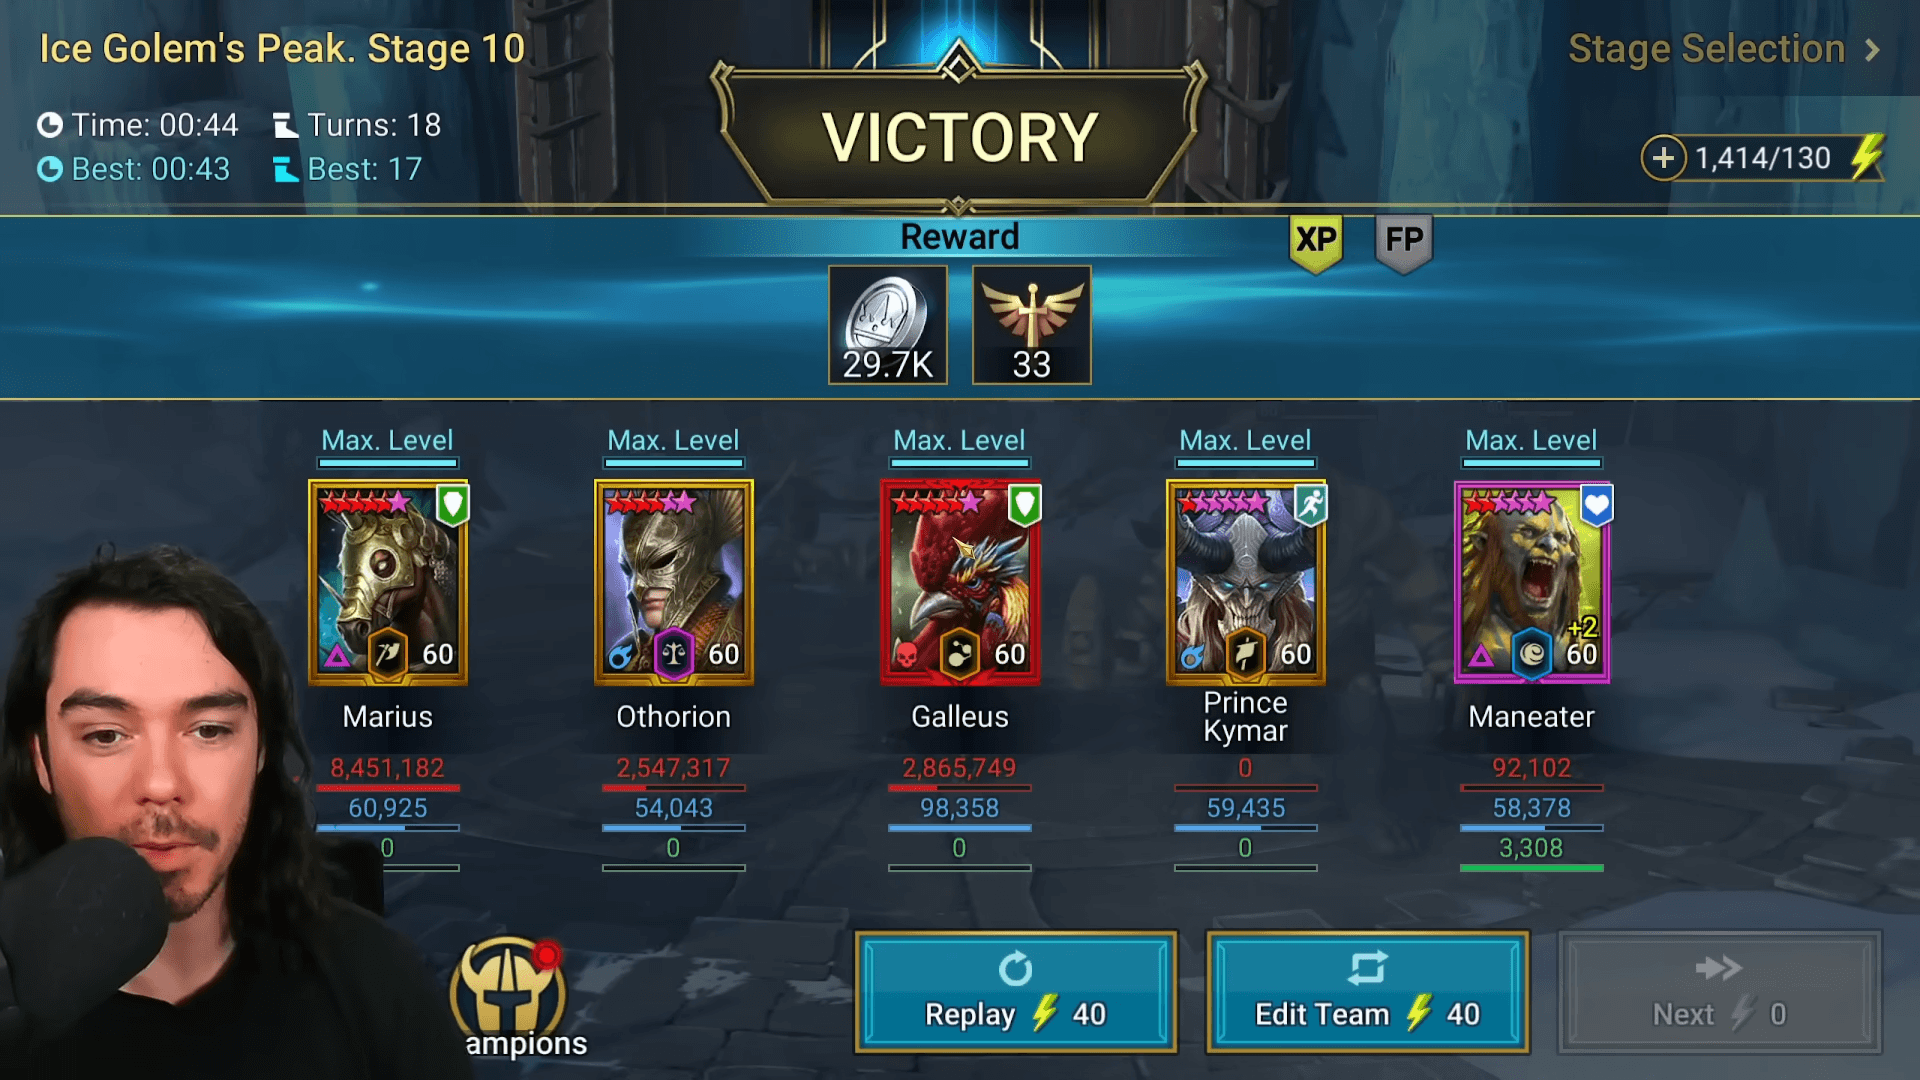
Hard Mode can punish teams that repeatedly trigger Frozen Reckoning, so strong protection can allow you to build more aggressively. Block Debuffs, Shields, Strengthen, healing, and Revive are all valuable, while Unkillable or Block Damage can enable teams designed to simply withstand the retaliation. Champions such as Maneater are particularly useful when building around this approach.
Team protection is also valuable when relying on a full team rather than a solo strategy, helping your Champions withstand the boss’s mechanics as you gradually wear him down through HP Burn or other damage sources. Effects like Decrease Attack are crucial to help your team withstand hits from the boss.
Solo & Duo Potential
Certain Champions can be built to handle Klyssus alone once the waves have been cleared, with Artak being a strong example due to his HP Burn activations and ability to sustain in the right build. Another option is pairing your main HP Burn option with a durable support or tank, creating a safer duo that combines consistent damage with the protection needed to survive the boss and minions.
Managing & Removing the Minions
You don’t always need to kill the minions immediately. Keeping them alive provides additional targets for HP Burn and its activations, allowing you to gradually destroy their MAX HP while damaging Klyssus. Once sufficiently weakened, Block Revive or Deathbrand can help permanently remove them, making the remaining boss fight much easier. (Or keeping them alive for further activation potential).
Full Team Damage Setups
Faster teams can instead combine HP Burn, activations, offensive debuffs, and strong direct damage to overwhelm the encounter. Decrease DEF and Weaken can amplify your damage, while protection such as Block Debuffs & Unkillable can allow you to intentionally survive Frozen Reckoning when powerful attacks push Klyssus through his HP thresholds.
Speed & Skill Cycling
Increase SPD, Turn Meter fills, and Decrease Skill Cooldowns help your team return to HP Burn, activation, protection, and recovery skills faster. This can be particularly valuable for repeating your Burn setup against the minions and ensuring defensive skills are available when Klyssus reaches another dangerous HP threshold.
Ice Golem Hard Mode Team Example
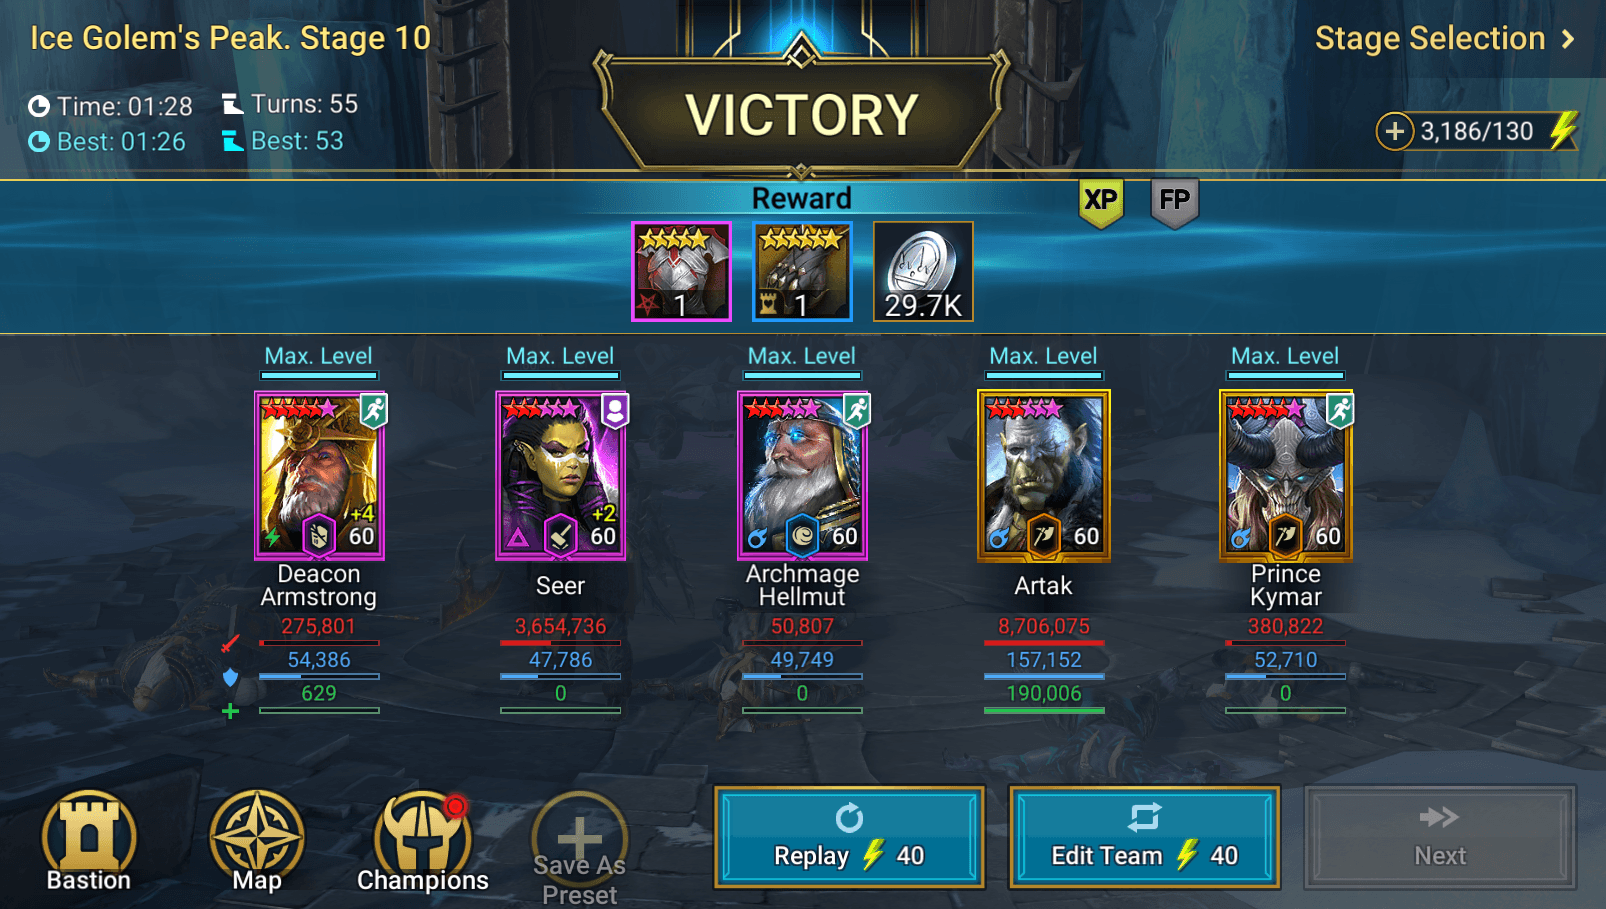
Here are five Champions that form the foundation of a fast Stage 10 Hard Ice Golem team, designed to quickly clear the waves before handing the boss phase over to Artak. The supporting Champions are intentionally vulnerable enough to fall early against Klyssus, leaving Artak to safely solo the remaining encounter through HP Burn, activations, and high resistance regeneration build to sustain.
Artak

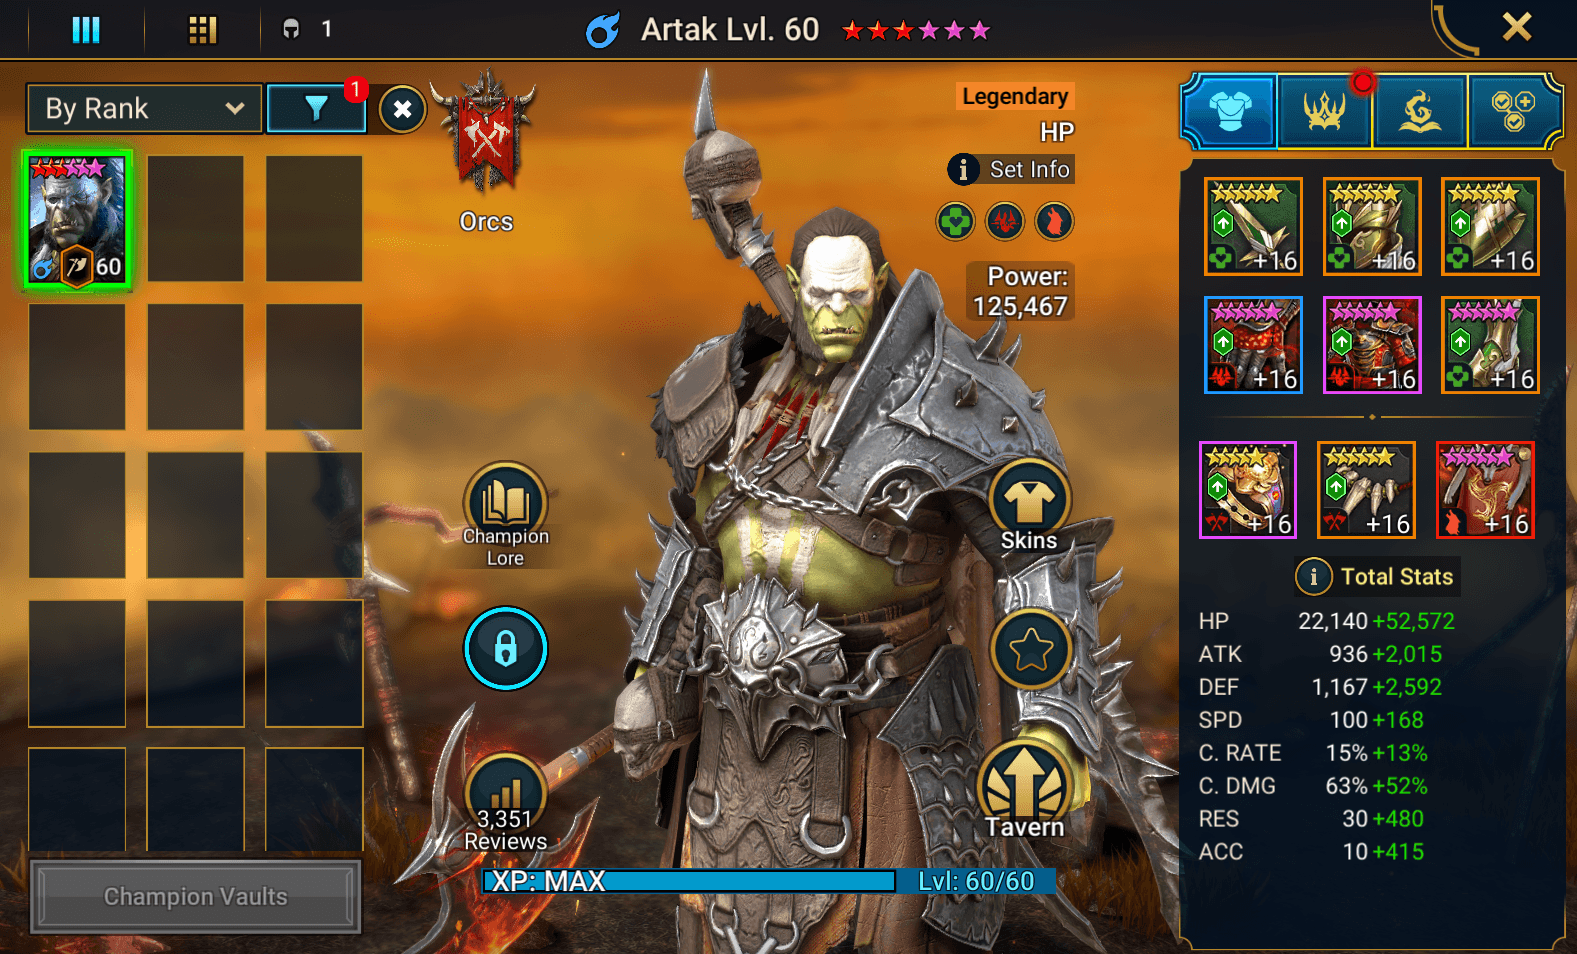
Artak is the core of the boss phase, placing HP Burn on all enemies before activating Burns and placing Decrease ATK with his A2. He’s built in Regeneration with 74K HP, 3.7K DEF, 268 SPD, 510 RES, and 425 ACC, allowing him to solo the encounter once the rest of the team clears the waves and falls.
As his MAX HP is destroyed, Artak’s passive increases his SPD and RES, helping him outpace and resist the boss while Regeneration provides the sustain needed to survive. He’s also equipped with the Golden Elixir Relic and Soul Reap Blessing.
Seer

Seer makes the team purely for her Karma Burn A3, melting through the waves once the required buffs are set up to maximise its damage. Against Klyssus, her active skills are disabled to avoid triggering Frozen Reckoning or dealing unnecessary damage to the minions, while she’s built vulnerable enough to fall quickly and leave Artak to solo the encounter.
Deacon

Deacon provides a strong budget option for the team, boosting ally Turn Meters to help outpace the waves while placing Decrease DEF. His All Battles SPD Aura also helps Artak reach the Speed needed for the solo boss phase. Like Seer, all of Deacon’s active skills are disabled against Klyssus, and he’s built vulnerable enough to fall quickly.
Archmage

Archmage serves as the main Seer enabler, placing three buffs on all allies with his A3 to fuel Karma Burn and maximise the wave clear. His A2 also provides Stun for teams that need additional wave control, although it isn’t required for this setup. Like the other supporting Champions, he’s built vulnerable enough to fall quickly once the team reaches Klyssus.
Kymar

Building Your HP Burners For Hard Mode
Build Focus
For Hard Ice Golem, Champions responsible for placing important effects such as HP Burn and Decrease ATK should have enough ACC to reliably land them, alongside the SPD needed to maintain their skill rotations. In full team setups, sets such as Perception, Speed, and Feral can help reach these requirements while the rest of your team provides the protection needed to keep them alive.
Survivability becomes increasingly important due to the amount of AoE damage Klyssus can deal. Effects or passives that reduce incoming damage can make these attacks easier to withstand, while sets such as Defiant and Stalwart provide additional AoE damage reduction. Healing, Shields, and other defensive support can further improve consistency, with a Reviver providing security for more vulnerable allies that fall during the fight.
Building a Solo Champion
Solo Champions require a much greater focus on survivability. A high RES Regeneration build is particularly effective, combining consistent healing, with stats focused on having enough SPD to cycle turns, ACC to reliably place HP Burn, and strong HP and DEF to withstand Klyssus and his minions.
Champions such as Artak & Pelops can excel with this approach, gradually wearing down the encounter through HP Burn and activations while relying on Regeneration and their defensive stats to sustain themselves without external support.
Tips for building Hard Mode Ice Golem teams

Managing Frozen Reckoning
- Watch the HP Thresholds – Frozen Reckoning triggers when direct damage pushes Klyssus below key HP thresholds. Plan your damage carefully or ensure your team can survive the retaliation.
- Keeping Minions Alive – Each surviving minion increases the DEF ignore and Freeze chance of Frozen Reckoning, so ensure your team has enough protection and sustain to survive the retaliation if your strategy relies on keeping them alive.
- Consider Block Revive – After HP Burn activations have destroyed enough of the minions’ MAX HP, finishing them with Block Revive can permanently remove them and make the remaining fight much safer.
Maximising HP Burn
- Keep HP Burn Active – Klyssus receives 10% more damage from HP Burn, making it one of the strongest ways to steadily wear down his large HP pool.
- Use HP Burn Activations – Activating Burns provides immediate damage without relying entirely on enemy turns, while also destroying 5% of the minions’ MAX HP each time.
- Cycle Your Burns Faster – SPD, Turn Meter fills, and cooldown reduction can help you return to HP Burn placement and activation skills more frequently.
Keeping Your Team Alive
- Reduce Incoming Damage – Decrease ATK, Strengthen, Shields, defensive buffs, and damage reducing passives can make Klyssus’s powerful AoE attacks easier to withstand.
- Protect Against Debuffs – High RES or Block Debuffs can prevent disruptive effects, while Remove Debuffs provides a way to recover when they do land.
- Bring Recovery – Strong healing and Revive can keep full teams progressing through longer fights and recover vulnerable Champions taken down by Frozen Reckoning.
Choosing Your Team Style
- Consider a Solo Champion – High RES Regeneration builds can allow Champions such as Artak & Pelops to handle the boss alone after the rest of the team quickly clears the waves.
- Try a Duo Setup – Pairing a durable HP Burn Champion with a strong protective support can provide a safer alternative without requiring a full five Champion boss team after clearing the waves with supporting allies.
- Build to Survive the Retaliation – Full teams can use effects such as Unkillable & Block Debuffs to withstand Frozen Reckoning, allowing more aggressive strategies to push through the boss’s HP.
Building for Consistency
- Reach Your ACC Requirements – Make sure Champions responsible for HP Burn, Decrease ATK, or other important effects have enough ACC for your chosen stage.
- Don’t Neglect Survivability – Regeneration is excellent for solo builds and support builds, while sets such as Defiant and Stalwart can help full team Champions withstand repeated AoE damage.
- Set Your AI Presets – Plan your wave skills and boss priorities carefully, particularly when using fast wave clear Champions before transitioning into a solo or specialised boss strategy.