
Who can SOLO Bommal in Doom Tower – Raid Shadow Legends
YST Has put together a comprehensive list of all of the Champions who are viable options to solo Bommal the Dreadhorn all the way up to Stage 90 on Hard difficulty, whilst there are other options who can handle the lower levels, these will stand the test against the hardest possible version of Bommal the Dreadhorn, considered one of the biggest Roadblocks in Raid Shadow Legends Doom Tower mode.
In this article, we will break down the potential Champions along with a video link to guides that other creators have put together for these builds, whilst also briefly explaining how these solo strategies work.
You can find more in-depth information regarding Bommal strategies on our full Bommel the Dreadhorn Guide linked to the button below.
Crimson Helm

This strategy is based around using her block damage / revive on death skills correctly depending on the situation. Unfortunately, with this is a manual strategy, paying close attention to things is important! The idea is to be placing her block damage just before the Dreadbombs explode (therefore taking no damage), and only using her revive on death at times where 2 bombs are active on Crimson Helm. Being the spirit affinity there will be patches where weak hits land, so saving the revive on death for when its needed is crucial for victory. Warmaster masteries is needed to beat the boss within the turn limit.
Helicath

This strategy is a great option for players who fused him, however it’s a build that’s very intensive in terms of HP requirements. The core mechanics around this solo strategy is like other block damage teams, placing the block damage before the Dreadbombs explode and tanking raw hits from Bommel (Whilst healing from Regeneration & Immortal gear). Although Helicath is spirit affinity which is ideal for weak hits, if a 3% chance to place weaken happens to occur, this could potentially lead to a failed outcome. (Multiple attempts may be required to gain a victory, but the upside is its full auto!)
Lady Annabelle

Arguably being the best solo strategy out there, she is one to build if struggling against Bommel. The core ideas around this strategy are abusing her Red Lady passive, where she can heal by 50% whenever an enemy dies (The Dreadbombs are classed as enemies in this situation). Once optimised in Regeneration / Immortal gear, you will consistently heal after taking Bommel hits (and her A1 3% heals), whilst healing more than the Dreadbombs are dealing to you (40% MAX HP). If looking for a straightforward solo champion to take this boss down, it doesn’t get much smoother than Lady Annabelle.
Templar
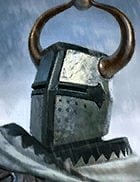
Once again block damage is one of the key components for solo strategies, but this time a farmable rare can get the job done! Although this strategy can take upwards of 20 minutes for completion, whilst having the patience for a manual encounter, if no other champions are available, he is a good option. One downside is the speed requirements whilst being equipped with Regeneration & immortal gear, however the low investment of rare skill tomes can be enticing for players seeking budget block damage options.
Kyoku

This solo strategy may be the fastest one out there! However, this is also reflected by the speed requirements for her build. There are slower variations pinned in the linked videos description, but if seeking to eliminate RNG the fast tune is optimal. This block damage solo strategy is full auto, and with times being recorded at under 6 minutes! So having to run a few times if losing to RNG isn’t as tedious as a 20-minute run.
Raf-Matab

He is a great block damage option for taking down the boss, and speed tuning is vital for placing this at the right time. Unlike some other options he can be full auto under the condition he’s NOT booked! So, if you have booked this champion a manual run will have to be your option. Being the spirit affinity is great for granting weak hits from the boss, therefore sustaining raw hits becomes more manageable built in Immortal / Regeneration gear for healing.
Samar Gemcursed

His passive eliminates incoming damage if it would cause him to drop below 30% HP. As the bombs explode almost at the same time – that would mean that this would trigger avoiding death. Regen and Immortal bring his HP back up to full and you will need speed as this passive does have a 4-turn cooldown.


i miss Samar Gemcursed here right?
True, why isn’t he here?
Thanks for spotting this, complete accident on our end – Samar has been added now
Why is burangiri not in this list. Was he not a specialist anti bommal champ??
Or am i missing something??
i’m guessing he is not mentioned because he only works up to level 50 hard.
he is listed on this page, and there is a link to his youtube video there.
https://hellhades.com/bommal-the-dreadhorn-guide/
Yeah, only works up to 50.
How is Connelia faring with the changed frenzy set? Up to what stage is she working?
(can’t decide if i max out Burangiri or Connelia for that reason)