


The Ultimate Epics For Hard Faction Wars – Demonspawn!
Hard Faction Wars has arrived in Teleria for those who have already claimed Lydia the Deathsiren as the ultimate reward for 3-starring all the stages in Normal difficulty. Now, the quest continues for the latest Faction Wars reward, Polara Fireheart – a Mythical champion from the Sacred Order. Along the way, you’ll earn some impressive milestone rewards as you push through these new stages. In this series of articles, we’ll be spotlighting some of the MVP Epic champions you should consider for each faction.
This new Hard Mode adds extra challenges to earn those 3-star clears: 1 star for simply completing the stage, 2 stars for finishing with 5 champions without losing anyone, and a final 3rd star for completing the unique stage condition. The Epics we’re featuring here range from top-tier powerhouses to those who fill a niche role – sometimes perfectly suited for tackling specific stage conditions, and sometimes offering broad utility that can cover multiple requirements.
You’ll also come across a stage that requires you to beat it using at least 3 Epic champions – so even if you have Meta Legendaries for most stages, these Epics will still find a place in your team for that challenge. Let’s dive into some of the best Epic champions from the Demonspawn!
Most Valuable Players

Umbral Enchantress

Aside from the 3 star room conditions on stages 2 and 12 that require landing Provoke debuffs, she remains a strong control option throughout other stages. Her main drawback is the self inflicted Block Active Skills debuff for 5 turns after using her Provoke, but this can be bypassed on the first attempt by building her in Stoneskin – allowing you to follow with her Block Buffs ability. From there, you can hold off on reusing her skills until the next wave, repeating the cycle as you progress. When it comes to crowd control at the Epic rarity, there’s no one better than Umbral Enchantress.
Magnarr
If you’re looking for a strong DPS option who’s tough to take down and don’t have access to top tier Legendaries, Magnarr could be a perfect fit. He’s a HP based nuker who deals an extra hit to enemies not under HP Burn – though for rooms that require HP Burn debuffs, this can shift to a Stun chance instead. This can actually work in your favour on stages 5 and 13, where landing Stun debuffs is required, giving him added value as a crowd control backup. Additionally, his debuff spread can come in handy for transferring effects like Block Active Skills or spreading his A1’s Decrease Defence to multiple enemies under HP Burn.
Akoth The Seared

Akoth is a champion obtained by collecting fragments from Normal Doom Tower Secret Rooms and can be a great across various stages. He’s especially useful in stages 1 and 8, where applying HP Burn debuffs is required – just be mindful not to defeat enemies too quickly, as his chance to land HP Burn scales with the number of alive enemies. Beyond that, his burns also enable his A3, which increases enemy skill cooldowns by 2 turns if they’re under HP Burn, while also shielding all allies for 20% of his Max HP. Simple yet effective, Akoth also brings a passive chance to place Fear debuffs on burned enemies, offering even more crowd control.
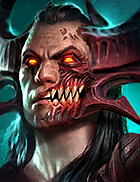
Duhr The Hungerer

Duhr is currently the only Epic in the faction with an active skill based revive, making him a key option if you’re lacking Legendary options. His A3 revives two random allies and boosts their Turn Meters by 50%, helping them rejoin the fight. Beyond that, he offers strong team support through Continuous Heal, Reflect Damage, and a 15% heal based on each ally’s Max HP from his A2. His A1 also provides a small chance to Stun, which can be helpful for meeting the stage 5 and 13 requirements. Overall, his sustain and utility make him a valuable support option in many team setups.
HONOURABLE MENTIONS


Achak The Wendarin
Achak earns an honorable mention thanks to the dual effects of her A3. When used against enemies with higher ATK than DEF, it applies Freeze for control, while against those with higher DEF than ATK, it places an HP Burn debuff instead. The main drawback is the RNG involved in consistently landing the debuff you want. However, by manipulating enemy stats with Decrease Defence or Decrease Attack, you can influence which effect she applies – making her useful for HP Burn stages or as a control option.
Her passive adds even more value by healing allies when burned enemies take a turn, or filling Turn Meters when Frozen enemies act. On top of that, she brings solid team utility with Block Debuffs and Strengthen, helping your team block effects and stay alive longer.
Skimfos
Many players may have already invested in this champion for his utility in areas like Fire Knight, Dark Fae, or any content that requires Turn Meter manipulation. In Faction Wars, he brings value as an AoE Decrease Attack champion, helping reduce incoming damage. He can also transfer debuffs from allies to himself (excluding control effects), then redirect those debuffs to an enemy while simultaneously stealing their Turn Meter – putting them in a vulnerable position for your team to finish them off. When under four or more debuffs, he can also apply offensive buffs to himself and deals respectable damage across his kit.
Gorlos Hellmaw
The main reason to consider Gorlos for your team is if you’re lacking offensive support with Decrease Defence. He brings this debuff as an AoE, making him useful for boosting your team’s damage output. Beyond that, his utility is more limited – he can apply HP Burn and Decrease Accuracy to a single target and manipulate his own Turn Meter to cycle through his skills more quickly. Pairing him with a debuff spread champion could help spread his single target debuffs across all enemies, potentially helping meet HP Burn room conditions in specific stages.
Souldrinker
If you’re missing higher rarity champions like Lord Shazar or Komidus, this champion becomes almost essential for clearing stages 4 and 9. These stages require defeating 5 or 10 enemies with Bombs for the 3-star objective, and carefully timing his detonations against vulnerable enemies is key to meeting that condition. He applies Bomb debuffs to all enemies with his A3, though they come with a 3-turn countdown. Following up with his A2 and A1 can help reduce that countdown and trigger the damage sooner.
Keeping enemies under control while the Bombs tick down is a smart strategy to prevent them from cleansing the debuffs before they explode. Souldrinker also applies additional Bombs upon death, with a shorter countdown, which can be clutch if he’s targeted and you have a reviver on the team to bring him back.