


Best Defence Based Champions in Raid Shadow Legends
In this guide, we explore the power of DEF based damage champions in Raid Shadow Legends. Focusing on those who specialise in both single-target or AoE damage, we break down why they excel across bosses, waves, and PvP, and what makes this type of champion so effective.
What defence based champions are
How Defence Scaling Works
Some champions deal damage based on their Defence instead of Attack or HP, meaning the more Defence they have, the harder they hit. This makes them very effective because building Defence not only helps them survive incoming damage, but also increases their damage at the same time, allowing them to be both durable and strong attackers.
Why Defence Based Champions Are Strong
Defence based champions can deal strong damage while also being very durable because the same stat that increases their damage also helps them take less damage from enemies. Unlike many Attack-based champions that need to sacrifice survivability for damage, Defence-based champions naturally become tougher as they get stronger, making them excellent for longer fights and difficult content where staying alive is important.
Why defence champions are valuable
High survivability
Defence based champions can survive longer in battles because high Defence mitigates some of the damage they take from enemy attacks. Since they are built around stacking Defence, they are naturally much harder to kill, allowing them to withstand heavy hits and stay alive through longer fights while continuing to support the team or deal damage consistently.
Balanced Damage & Protection
These champions can combine strong damage output with survivability, allowing them to stay alive longer while still contributing meaningful damage throughout a fight. In many cases, they may also bring valuable support through buffs, debuffs, or utility skills, helping protect the team, weaken enemies, or improve overall consistency.
Best Areas to Use Defence champions

Demon Lord, Hydra & Chimera Clan Boss
Their strong survivability makes them especially effective against Demon Lord, Hydra, and Chimera Clan Boss, where fights are long and incoming damage can steadily wear you down. Because they scale their damage from Defence, they can remain durable while still contributing consistent damage throughout the battle, allowing them to survive hits that might otherwise defeat more fragile damage dealers. Many also bring valuable buffs, debuffs, or utility to support the team, making them great options for sustained boss encounters where both damage and survivability are equally important.
Due to the nature of these fights, success is measured by how much damage you can deal before reaching the turn limit or your team is defeated, rather than how quickly you can finish the encounter. With key reward thresholds tied to higher damage, maximising your output is essential – and this is where your primary damage dealers play a crucial role.
PVE Bosses
Their natural durability helps them survive difficult bosses and enemy waves across dungeons, Doom Tower, Cursed City, Grim Forest, and Faction Wars by reducing the amount of damage they take while still contributing meaningful damage or utility. This makes them especially reliable in longer fights and tougher stages, where surviving heavy hits and sustained pressure is important.
Arena Battles
Their durability allows them to perform very well in PvP fights, as they can survive incoming attacks while continuing to pressure the enemy team over time. Because they scale damage from Defence, they are able to deal solid damage without sacrificing survivability, making them much harder to eliminate than more fragile damage dealers.
Best defence based champions in raid
Here we’ve highlighted some of the top Defence Based champions in Raid: Shadow Legends, showcasing the different strengths they bring. While this list isn’t exhaustive, it should give you an understanding of what makes these champions so effective. For more options, be sure to check out our Champion Tier List.
Marius
Marius is known as one of the most powerful nukers in Raid, with the ability to unleash a triple hitting AoE enemy MAX HP attack while also decreasing the duration of enemy buffs. This, combined with his ability to place Increase ACC and Increase DEF, alongside stunning the enemy with the highest Turn Meter, gives him a strong blend of damage, support, and control.
He also brings Enfeeble to force weak hits from enemies, while being passively immune to Turn Meter reduction and Decrease SPD, making him both reliable and difficult to counter.
Ragash

Ragash offers a strong combination of damage, debuffs, and control. His crowd control comes from his A2, which first places Decrease DEF on enemies before attacking, then applies a Stun, ensuring that even if enemies survive the initial hit, they’re still controlled and vulnerable to follow up damage. He also supports the team with Strengthen and Increase SPD buffs, while placing Perfect Veil on himself and the highest ATK ally for added protection. On top of this, he deals increased damage to enemies with lower DEF than his own, making him both a reliable damage dealer and control option.
Titus
Titus offers a unique approach to damage, capable of delivering incredible numbers under the right conditions. His A2 scales based on the difference between his MAX HP and the value of his Shield, allowing for massive damage potential when set up correctly. While he is reliant on support from allies like Wixwell, buff extenders, and longer fights like Clan Bosses to fully ramp up, the scaling he can achieve in these scenarios is exceptional.
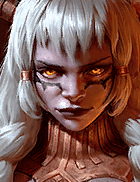
Harima

While Harima does bring an AoE attack with Provoke, she also excels as a scaling single-target nuker. Her A2 is a triple hit attack that simultaneously decreases the target’s DEF by 5% per hit, up to 30%, while increasing her own DEF by 5% per hit, stacking up to 100%. This combination of self scaling and stat manipulation allows her damage to ramp up significantly as the fight progresses, while her passive further strengthens her by reducing the effectiveness of enemy ignore DEF mechanics.
Tormin

Although Tormin gains even more value when paired with Hilvi, he is also a strong standalone champion for both damage and control. He can apply Heal Reduction, Block Buffs, and Freeze to enemies, while also being able to Provoke targets not under Freeze and manipulate enemy cooldowns. He further enhances his control by removing or stealing buffs from a target, while ignoring DEF against enemies under HP Burn or Freeze. Combined with his A1 AoE Freezes and powerful passive, this makes him strong for PvE waves and PvP encounters.
Gnut

Gnut stands alongside champions like Marius as one of the top Enemy MAX HP damage dealers for bosses. His triple-hit attack allows him to scale this damage more effectively compared to single hit options like Coldheart, giving him greater consistency and output. While traditional damage dealers can now outscale due to the 10% or 5% damage caps on bosses, Enemy MAX HP remains one of the best ways to speed run dungeons and other bosses.
Morag
Morag has the power to deal both single-target and AoE damage, while also providing strong defensive and offensive support for the team. She brings Strengthen to all allies, and while under this buff, can trigger counterattacks whenever she is hit, adding extra damage and pressure. She can also team up with two random allies to attack an enemy, making her great for burst damage or encounters like Fire Knight, where additional hits help deplete the boss’s shield faster.
Leonardo

Leonardo is a perfect example of a champion who blends strong damage with team support. He can apply Increase DEF and Ally Protection for the team, while placing Unkillable and Counterattack on himself to stay in the fight and deal consistent damage.
His A3 is where his power truly shines, once Unity is enabled alongside other Turtles, the skill scales significantly, can activate when allies drop below 50% HP, and increases in damage based on enemy buffs. If he secures a kill, he also removes those buffs, making him a powerful option for both damage and support.
Hoskarul
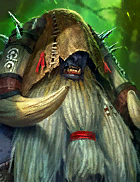
Hoskarul has remained a top-tier Epic since his release, offering support, damage and crowd control. His A2 provides a strong chance to Stun enemies while also decreasing their Turn Meter if the Stun lands, helping you maintain control over enemies. He also supports the team by removing Stuns from allies and placing Increase DEF and RES buffs, while being immune to Stun himself to ensure he can perform his role. On top of this, his A1 also has a chance to Stun.
Staltus
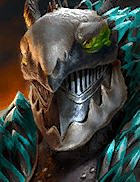
If you’re looking for a defensive damage dealer who can also control and debuff enemies, Staltus is a great option. His A2 hits multiple times with a strong chance to Stun on each hit, allowing for reliable crowd control while dealing solid damage. He can also buff himself with Increase DEF on his A3, then apply either Decrease C.DMG or Decrease SPD depending on the enemy’s stats. His passive adds even more value, reflecting debuffs like Decrease DEF, Weaken, or Poisons back onto enemies, which makes him especially effective for content like Dragon.
How to build defence based champions

Defence & Speed Requirements
Firstly, you want to ensure you’re building your DEF-based champion around the stat they scale from, being DEF. Prioritising this key stat will maximise their damage output & sustain, alongside reaching 100% Crit Rate (unless their kit guarantees critical hits) and stacking Critical Damage to push that damage even further.
Once these foundations are in place, combining them with the right gear sets, alongside Relics, Masteries, full skill upgrades, and Blessings, will allow your damage dealers to truly reach their full potential. For champions who also bring utility through buffs or debuffs, make sure they have the required Speed and Accuracy for the encounter, with the Stages Tool helping you reach the right thresholds.
Recommended Artifact Sets
The best gear sets for defence based damage dealers are those that allow you to ignore DEF, such as Savage, Lethal, and Merciless. Merciless stands out as the top choice for PvE, offering the highest Ignore DEF potential alongside cooldown reduction, and even a chance for Extra Turns with the 9-piece bonus. If using Merciless, we recommend aiming for at least a 6-piece setup.
For earlier progression, Savage and Lethal are much more accessible, both requiring only a 4-piece set. Savage can be farmed from Fire Knight, while Lethal is crafted from Dark Fae materials. These can also be paired with other sets like Perception or Feral to help meet Accuracy and Speed requirements, especially for hybrid champions.
Additionally, any filler sets that provide DEF stat boosts can be very useful. Sets like Defiant not only increase survivability through stats but also reduce AoE damage taken by 15%, while Stoneskin is especially strong for PvP, offering both defensive stats and protection from opening attacks through the Stoneskin buff.
Tips for using defence champions
Using DEF based champions effectively comes down to balancing both offence and survivability. While DEF is their primary scaling stat and naturally makes them tankier, Critical Rate and Critical Damage still play a huge role in maximising their damage output, especially for champions focused on wave clearing, boss damage, or PvP nuking.
Pairing these champions with strong support greatly increases their value. Increase DEF not only improves survivability but can also directly increase the damage DEF-based champions deal, while buffs like Strengthen, Shields, Ally Protection, and healing help them stay alive longer and continue scaling damage throughout extended fights.
Speed and utility are also important for DEF-based champions who bring debuffs or support alongside their damage. Ensuring they have enough Speed and Accuracy for the encounter helps maintain consistent uptime on key effects while keeping pressure on enemies. When built correctly and supported properly, DEF-based champions become some of the most reliable and durable damage dealers in the game.