


Ostrox Boneglaive – Champion Spotlight
Ostox is one of the strongest Epic Block Buffs champions in Raid: Shadow Legends, and offers solid support utility alongside his core role. Whether it’s shutting down buffs on waves & Hydra heads, boosting your team’s Accuracy to hit key stat thresholds, or cleansing harmful debuffs, Ostox brings a simple yet highly effective kit. In this guide, we’ll dive into why he’s such a valuable Epic in 2025, explore his best build options, and highlight the areas where he truly shines.
HYDRA

Bringing Block Buffs into a Hydra team is crucial for preventing the heads from placing or receiving buffs during the fight. This shuts down dangerous effects like Poison Cloud, Increase Attack, and Reflect Damage, giving you greater control over the fight and limiting the Head of Mischief from stealing and spreading buffs. As a Void champion, Ostox avoids any affinity disadvantages across rotations, and having Block Buffs on a 3 turn cooldown with a 3 turn duration allows for full uptime. This also means he can quickly cycle the skill to reapply it as soon as heads respawn.
Ostrox’s A3 is also strong, offering a team wide random debuff cleanse to remove tedious effects like Provoke, Decrease Attack, and Heal Reduction if they slip through. In addition, he places Increase Accuracy on all allies – a valuable buff for hitting the high Accuracy thresholds needed to land your debuffs in areas like Hydra. As you progress to higher difficulties, where Hydra heads can exceed 300 Resistance, this buff becomes even more valuable. We recommend using the Stages Tool for the specific encounter you’re facing to help determine the target stats your team needs to hit.
Ostrox also has a passive 20% chance to reflect debuffs back to the attacker when enemies attempt to place them on him. This can be especially useful in situations where he reflects a Provoke, allowing him to follow up with his A3 and cleanse it from his allies. His A1 adds even more utility, transferring a random debuff from himself to an enemy – such as Weaken – while also healing your lowest HP ally by 10%. Overall, he’s a straightforward yet highly effective champion, especially if your team is missing reliable access to Block Buffs or support utility.
Buff Heavy Waves

Block Buffs is an effective ability against enemy waves in areas like Dungeons, Doom Tower, and The Cursed City. Many enemies stack multiple buffs, and shutting those down can make progression significantly smoother. If one use per wave is enough, setting up the right AI presets ensures Ostrox saves the skill for the start of each round. Without proper AI, he may waste it on a single remaining enemy, leaving it on cooldown when the next wave begins.
Since Ostrox’s Block Buffs lasts 3 turns when used against four or more enemies, making him one of the fastest in your team is ideal. This ensures he lands the debuff before enemies are defeated – otherwise, the duration may drop to just 2 turns.
We’ve all faced frustrating Faction Wars stages with enemies like Valkyrie throwing up massive shields & Counter Attacks. These are the kinds of encounters where Ostrox shines, especially if you’re lacking higher rarity champions in the faction who can apply Block Buffs. His Increase Accuracy buff and mini cleanses also help against high resistance waves or bosses where you’re struggling to hit the required stat thresholds.
How To Build Ostrox Boneglaive
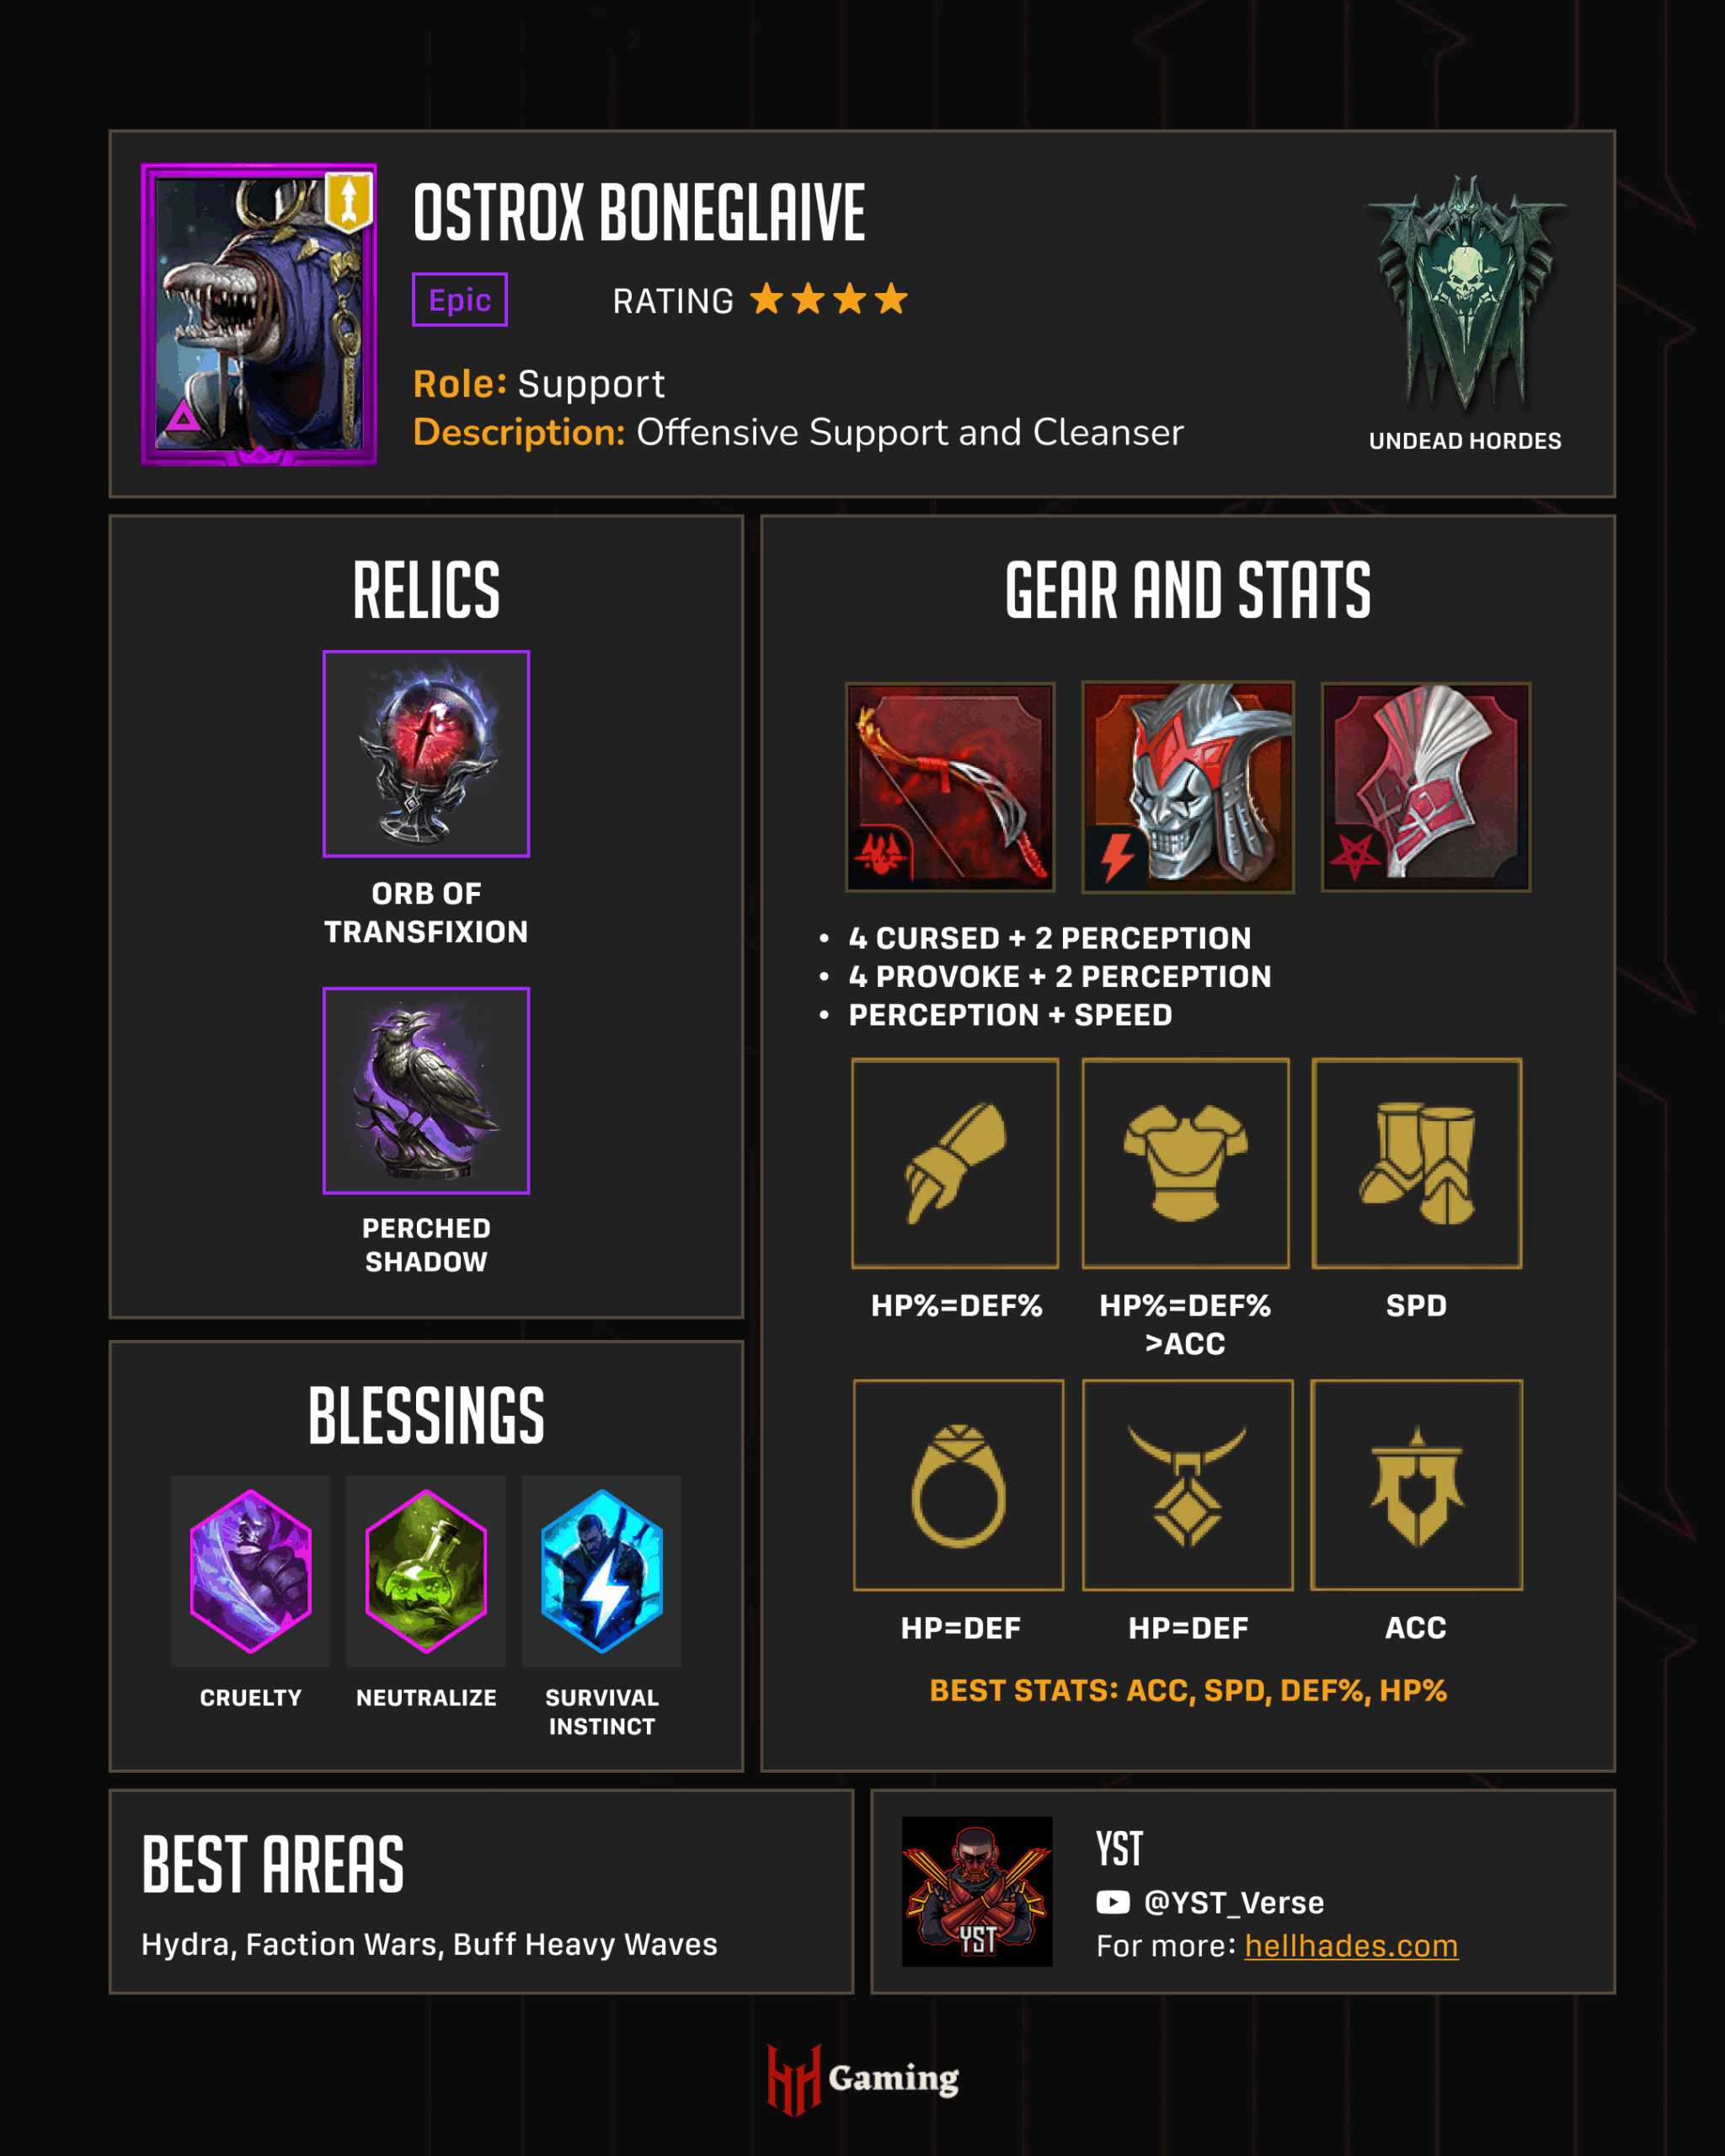
As shown in the infographic above, focusing on high Accuracy, Speed, and sustain is the most effective way to build your Ostrox. You want to ensure he can consistently apply debuffs against targets, cycle through skills quickly – especially with the A3 on a 4 turn cooldown – and able to take a hit.
- The Cursed and Perception route is a great option if your team lacks a Hex source, or to synergize with another ally in Cursed gear for back and forth placements. Perception provides ideal set bonuses for Ostrox, boosting both Speed and Accuracy.
- A similar approach can be taken with Provoke gear, serving as a backup control option when your main Provoker weak hits, gets resisted, or is devoured later in the fight. While not primary, it adds a layer of safety and utility.
- A full Perception build is also viable, allowing you to stack more set bonuses and further increase Speed and Accuracy if you’re falling short of the required thresholds.
For accessories, flexible sets like Feral or Pinpoint offer Speed and Accuracy bonuses, even with just 1-3 pieces, making them a valuable addition to your core setup. If you’re relying heavily on the A3, Relentless or Reflex sets can increase usage frequency. Just be cautious – Relentless can increase his turn count in Hydra, which can lead to reaching the turn cap faster.
Check the infographic for suggested stats, blessings, and relic choices to help optimize your build.