


The Ultimate Epics For Hard Faction Wars – Dwarves!
Hard Faction Wars has arrived in Teleria for those who have already claimed Lydia the Deathsiren as the ultimate reward for 3-starring all the stages in Normal difficulty. Now, the quest continues for the latest Faction Wars reward, Polara Fireheart – a Mythical champion from the Sacred Order. Along the way, you’ll earn some impressive milestone rewards as you push through these new stages. In this series of articles, we’ll be spotlighting some of the MVP Epic champions you should consider for each faction.
This new Hard Mode adds extra challenges to earn those 3-star clears: 1 star for simply completing the stage, 2 stars for finishing with 5 champions without losing anyone, and a final 3rd star for completing the unique stage condition. The Epics we’re featuring here range from top-tier powerhouses to those who fill a niche role – sometimes perfectly suited for tackling specific stage conditions, and sometimes offering broad utility that can cover multiple requirements.
You’ll also come across a stage that requires you to beat it using at least 3 Epic champions – so even if you have Meta Legendaries for most stages, these Epics will still find a place in your team for that challenge. Let’s dive into some of the best Epic champions from the Dwarves!
Most Valuable Players

Demytha
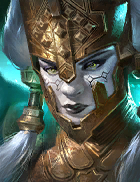
Although Demytha doesn’t directly enable some of the stage conditions, she still proves to be an excellent choice for team protection and healing. With a 3-turn cooldown [A3], she can provide Block Damage and a Continuous Heal buff to allies, helping your team survive both wave and boss attacks. She also extends your buffs, reduces the duration of debuffs, and heals for even greater amounts based on the durations she manipulates.
Conellia
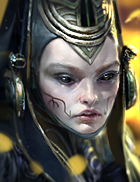
Conellia earns her place on the list thanks to the sheer amount of crowd control she can apply. Her A2 places a Sleep debuff on all enemies which, while not as strong as effects like Stun, can trigger a Fear when enemies lose their Sleep – giving you the potential for two layers of control. The trade off is that this can be disrupted by frequent AoE attacks waking enemies early.
She also brings a unique A3 that puts an ally to Sleep and, when that ally is woken by taking damage, fully heals them and boosts their Turn Meter by 100%. If they wake themselves, the boost is 50%, giving her a quirky but powerful tool for supporting key allies. Lastly, Conellia has a 50% chance on her A1 to increase the cooldown of one of the target’s skills by 2 turns, which can be helpful for stage 13.
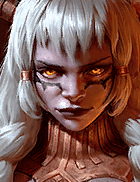
Hilda

Hilda is one of the newest additions to the Dwarves faction and comes with a powerful kit for both waves and certain bosses. Her passive boosts ally damage against enemies under her Heal Reduction or Stun debuffs by 15%, with her A3 providing a 60% chance to apply Stun – letting your team cut through affected targets more quickly. Even against bosses, you can benefit from this damage boost by applying Heal Reduction through her A2.
She also brings Increase ATK for the team and can ramp her own A2 damage by up to 100%, scaling by 10% for each debuff on the target. Combined with strong multipliers on both her AoE and single-target attacks, Hilda excels at amplifying team damage, dealing damage herself, and providing solid control. This is especially valuable for stage conditions that require Stun, such as stages 2 and 9.
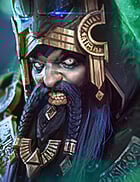
Rockbreaker

Rockbreaker is currently the only Epic in the faction who can apply Provoke to all enemies without relying on a Provoke set, making him especially valuable for stages 3 and 11, as well as for general crowd control. Alongside his AoE Provoke, he applies Counterattack to himself, allowing him to stack his bonus DEF more quickly – gaining 4% with each A1 used until he reaches the 20% cap. He also benefits from a passive that gives him a chance to reduce incoming damage by 50% when attacked, adding even more durability to his kit.
HONOURABLE MENTIONS


Geomancer
Geomancer is best known for his ability to melt bosses through his passive damage reflection, but he can also be strong in wave content with the right gear. Many stage conditions require Stun, Provoke, or Freeze debuffs, and since he has an AoE A1, you can equip the relevant sets to roll for these effects – especially when paired with an ally who can help land them consistently.
He also reduces the damage your team takes from enemies under his HP Burn, controls a target’s Turn Meter so they can’t cut in, and steadily wears them down through reflected damage. In addition, he can strip buffs from single targets, making priority enemies or bosses easier to take down.
Morag Bronzelock
If you’re looking for a durable champion who offers both damage and team support, Morag is a great choice. Stage 16 requires defeating three or more enemies using Ally Attacks or Counterattacks, and her A3 fits perfectly – she teams up with two random allies to strike a target, while also counterattacking herself whenever she’s hit under Strengthen. This is useful not just for the stage condition but also for extra burst damage against priority enemies.
She also applies Strengthen to the whole team and brings an AoE attack to help clear waves more quickly. Simple, sturdy, and effective.
Gala Longbraids
Gala is here for one purpose: delivering massive damage to priority targets. She shines in stage conditions like Stage 5, where you must reduce six or more enemies to 50% HP with one skill, but she’s equally strong for cutting through tanky opponents in general. Her A3 ignores 25% DEF with each hit and grants an Extra Turn if she’s at full HP. From there, her A2 can ignore 50% DEF while she’s under a Shield. You can trigger this with a Bloodshield accessory or rely on allies to set it up.
Her A2 also heals her for 50% of the damage dealt, converting any excess healing into a Shield to help maintain the setup. Her A1 ignores 30% DEF and can refresh her Shield, allowing her to loop back into her A2 for more heavy hits.
Runekeeper Dazdurk
This champion has flown under the radar since his release, but he offers strong offensive and defensive support. Stage 6 requires manipulating Turn Meters 40 or more times, and his A2 helps with this by boosting ally Turn Meters by 25% while also placing Increase ATK on the team. He also provides a full-team cleanse with his A3, healing allies and placing Continuous Heal on anyone who had a debuff removed – making him especially useful against waves that pile on harmful effects.