
")

YST’s Chimera Clan Boss Team – Ultra Nightmare!
How’s it going, everyone? YST here, and today I’ll be breaking down the team I built to take on the Chimera Clan Boss. This setup works for both Nightmare and Ultra Nightmare difficulties. In this article, I’ll spotlight my thought process behind choosing these champions, things I aim to improve on in the future, and how I’ve optimized their builds to maximize results. Of course, the Chimera hasn’t been out for long, so there’s plenty of room to refine strategies for better Clash results and to beat more trials for those multiplier bonuses!


Why Did I Choose Them ?
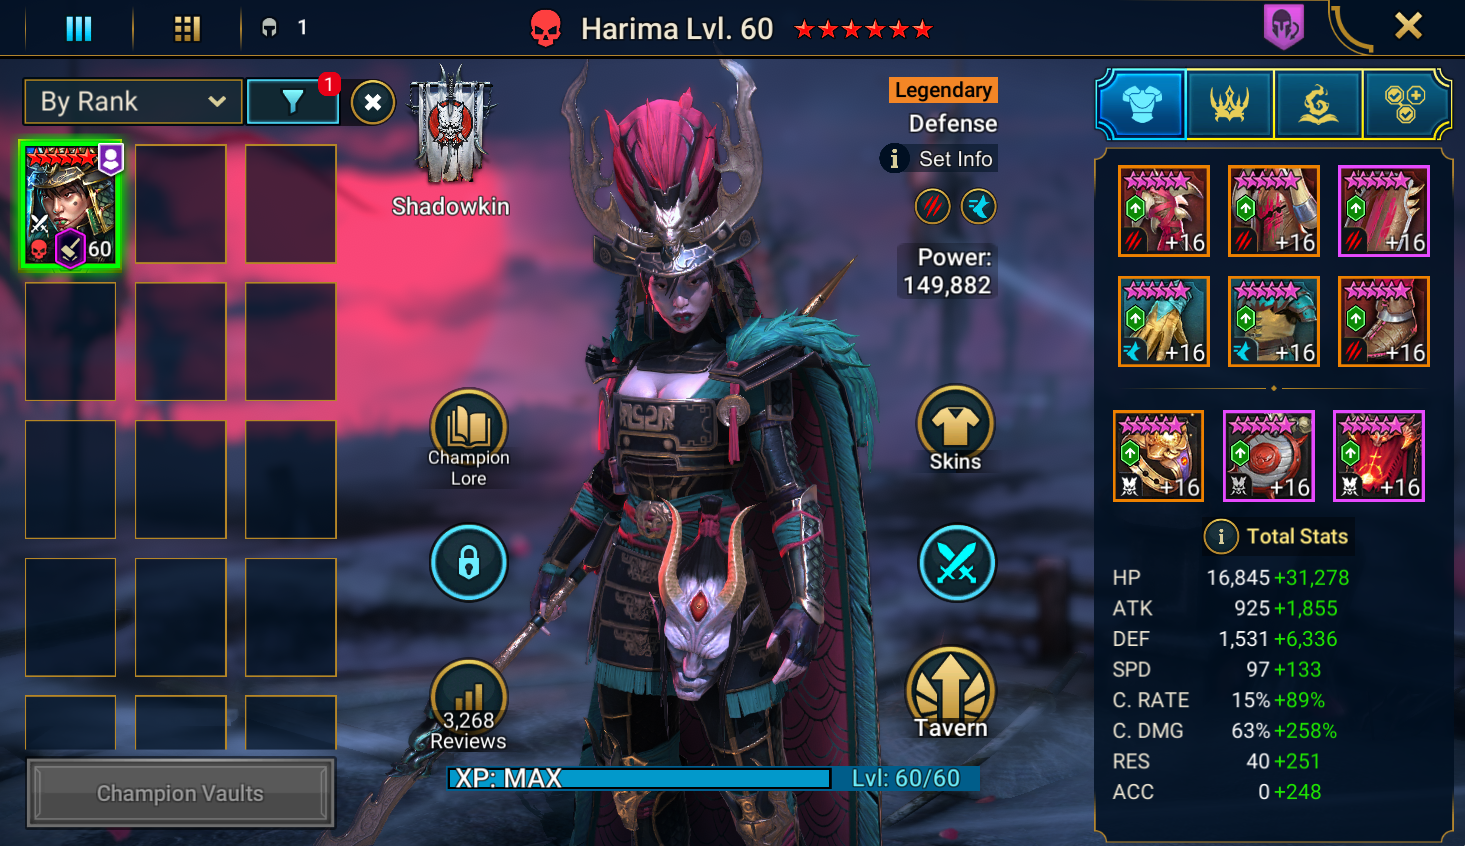
For my first & only team I’ve built so far, I didn’t want to rely on Enemy Max HP champions such as Gnut who’s already in so many teams. Instead, I turned to Harima, one of my most dominant damage dealers, who has always been a key part of my Nightmare Hydra team. I was eager to see how she’d perform against the Chimera. Her ability to decrease a target’s defence by up to 30% while increasing her own by up to 100% scales incredibly well over the fight, maximizing her damage & sustain.
Harima truly hits hard across all her abilities, and with her powerful A1, she synergizes perfectly with Padraig’s ally attack, allowing her to inflict further damage. Being defence based, she’s also tough to take down on the later difficulties, although the Ram form’s damage reflections do manage to wipe her out consistently. Finally, having a 6 star Crushing Rend blessing on her is just too strong to overlook, making her an exceptional choice for this encounter.

Since pulling Senna Amberheart, she has become a staple in many of my end game teams, including Fire Knight, Hydra, and Arena. For the Chimera Clan Boss, her passive provides an incredible amount of Turn Meter fills from the Continuous Heals that activate on allies. This allows my team to take significantly more turns than usual, cycling back to their active skills faster, resulting in increased damage and more timely cleanses on full auto. Her A2 enables this by placing two Continuous Heals on allies, along with Increase Speed and additional Turn Meter boosts.
The Ram Form is particularly challenging, as the damage reflections often knock out my nuker and Duel target due to repeated attacks. This is where Senna’s revival is essential, ensuring that fallen allies can re-join the fight. During this phase, it feels like a constant cycle of losing and reviving champions until Chimera switches forms again. Her revival is equally valuable against the Viper Form, where poison detonations can occasionally take out key allies. To maximize her effectiveness, I built her in a Protection set, ensuring some buffs remain intact against the Ultimate and Viper Forms, as well as Critical Damage stats to ensure she’s not the Duel target.

Once again, Firrol the Barkhorn proves his worth, this time stepping up to face the Chimera! The variety of effects he brings counters many of the Chimera’s mechanics across all forms while also enabling several trials. Against the Ram Form, he unlocks easy trials for Increase Accuracy and Perfect Veils, while his multiple buffs and Decrease Speed help clear all of Trial 2 of the Lion Form, with additional trials awaiting as I progress further.
Firrol’s skill set allows my team to withstand debuff removals and other harmful effects through the combination of Increase Resistance and Decrease Accuracy. Block Buffs prevents the Chimera forms from placing or stealing buffs, while Decrease Speed keeps the battle under control. His passive further enhances my team’s damage output, and by building him in a Protection set, I’m able to amplify this effect while safeguarding his buffs from being removed.
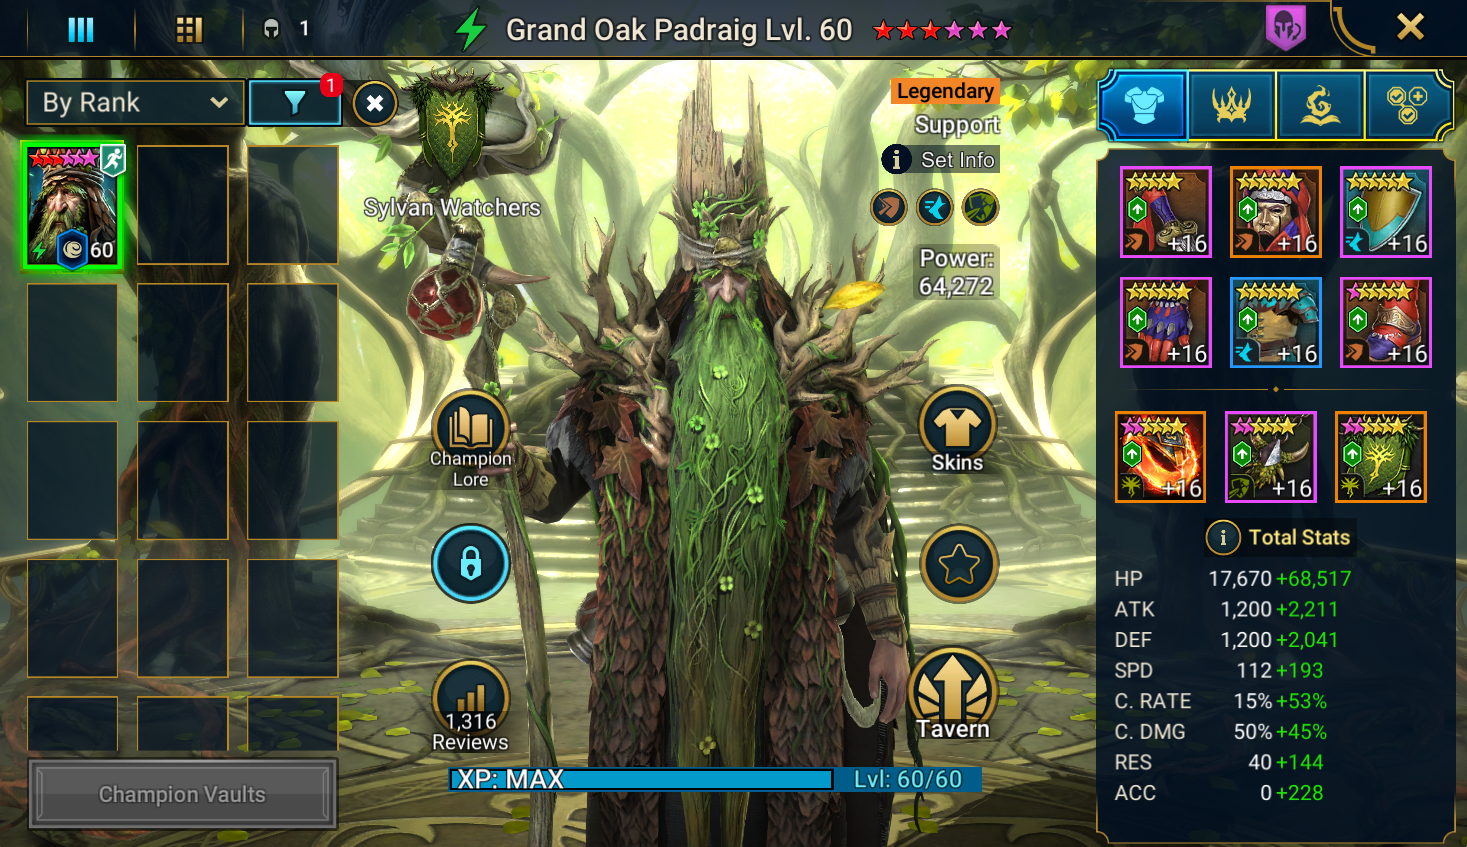
Grand Oak Padraig plays a pivotal role in both my Fire Knight Hard and Brutal Hydra teams, and his value continues to shine against the Chimera. While I typically lean toward Mikage, especially with Harima as my damage dealer, Padraig’s passive and additional Continuous Heals make him a perfect fit for this team. His passive grants buffs to allies every turn based on their type, ensuring Harima receives Increase Defence to boost her damage while providing support to other allies. Despite a slight overlap with Senna’s Increase Speed, the Turn Meter fill aspect of his A3 complements the team’s synergy.
Padraig’s A2 Ally Attack ensures consistent application of crucial A1 debuffs from allies like Firrol, boosting overall team damage and enabling the completion of Trial 2 against the Lion Form. The Continuous Heal component of his A2 pairs excellently with Senna, enhancing Turn Meter manipulation for smoother rotations. Additionally, his A1 contributes to the team’s efficiency by reducing random ally cooldowns, allowing skills to cycle more quickly.
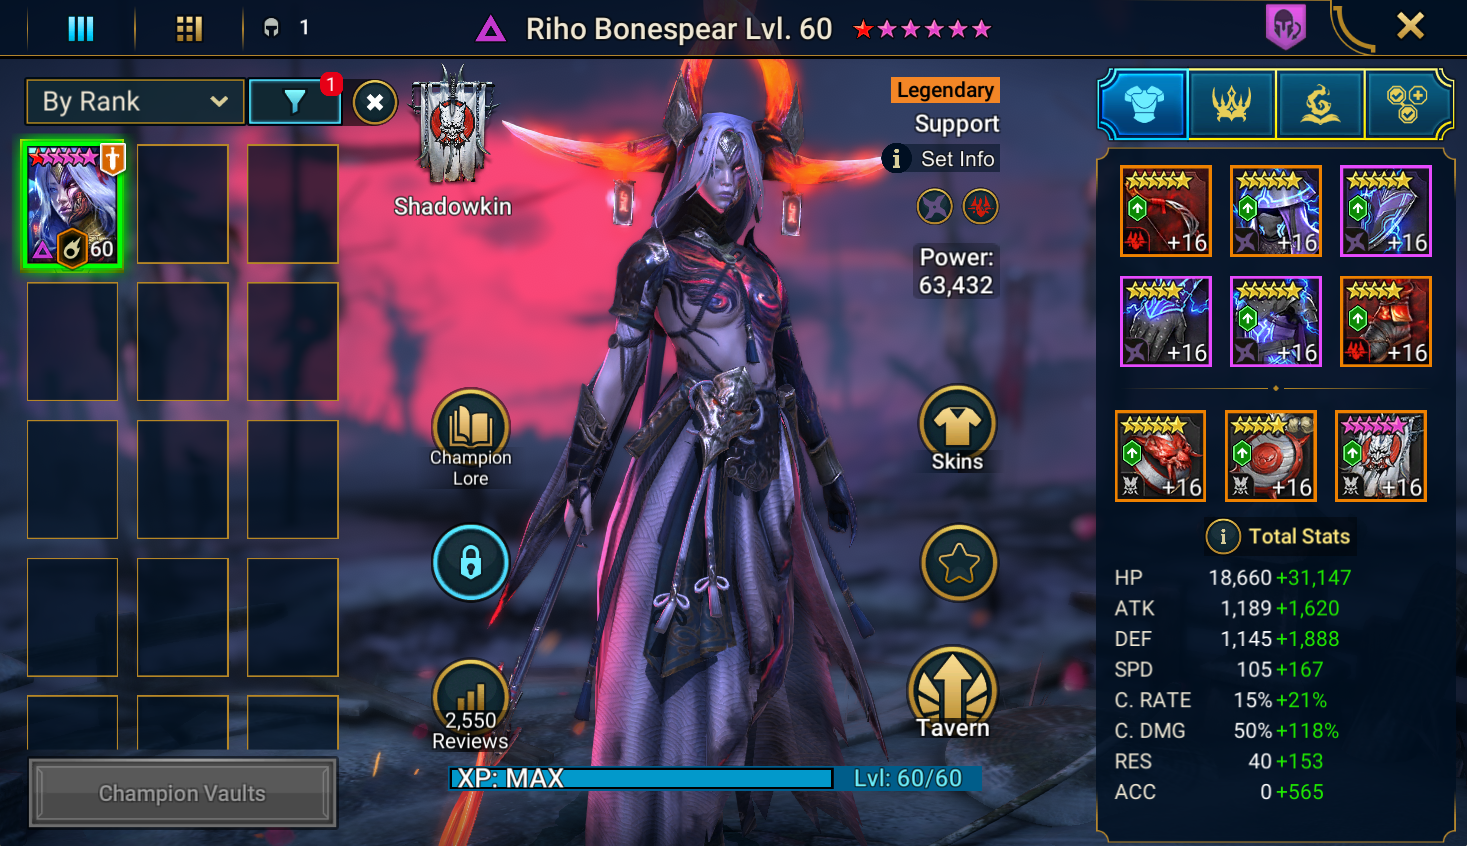
Last but not least, Riho Bonespear earns her spot on my Chimera team. Her ability to place multiple key debuffs on a single target is invaluable and has secured her roles in my Phantom Shogun and Sand Devil teams as well. With her A2, Riho applies HP Burn, Decrease Defence, Weaken, Decrease Attack, and Decrease Crit Rate, providing both survivability and increased damage output for the team.
When a heal or cleanse becomes critical, especially if Padraig falls, her A3 ensures further team support by removing debuffs and restoring health. Additionally, her A1 provides Continuous Heal to synergize with Senna’s Turn Meter manipulation, and her passive allows her to transfer any debuffs she receives back to the attacker.
Damage Results
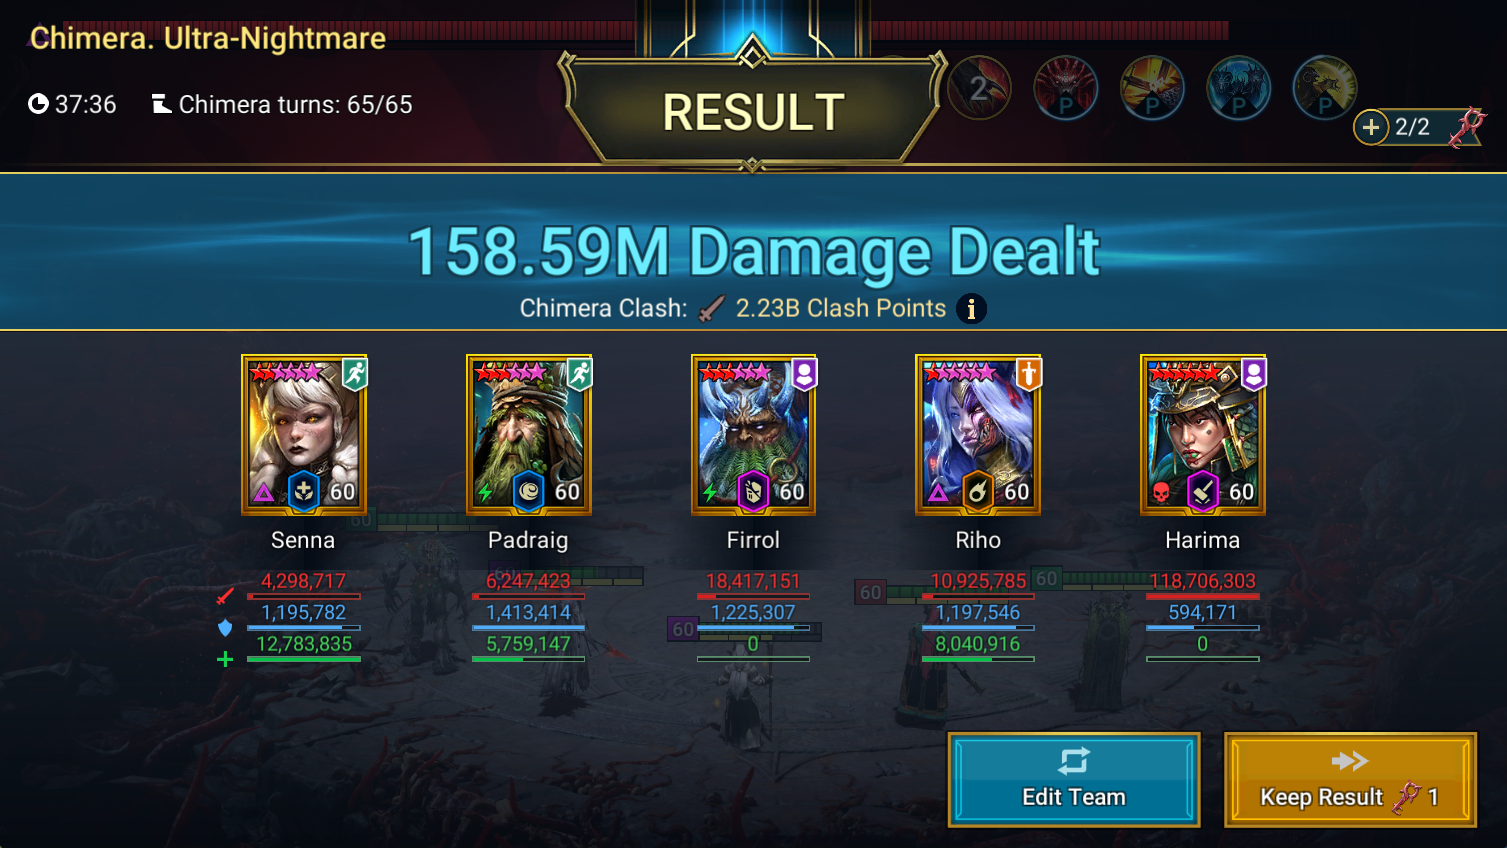
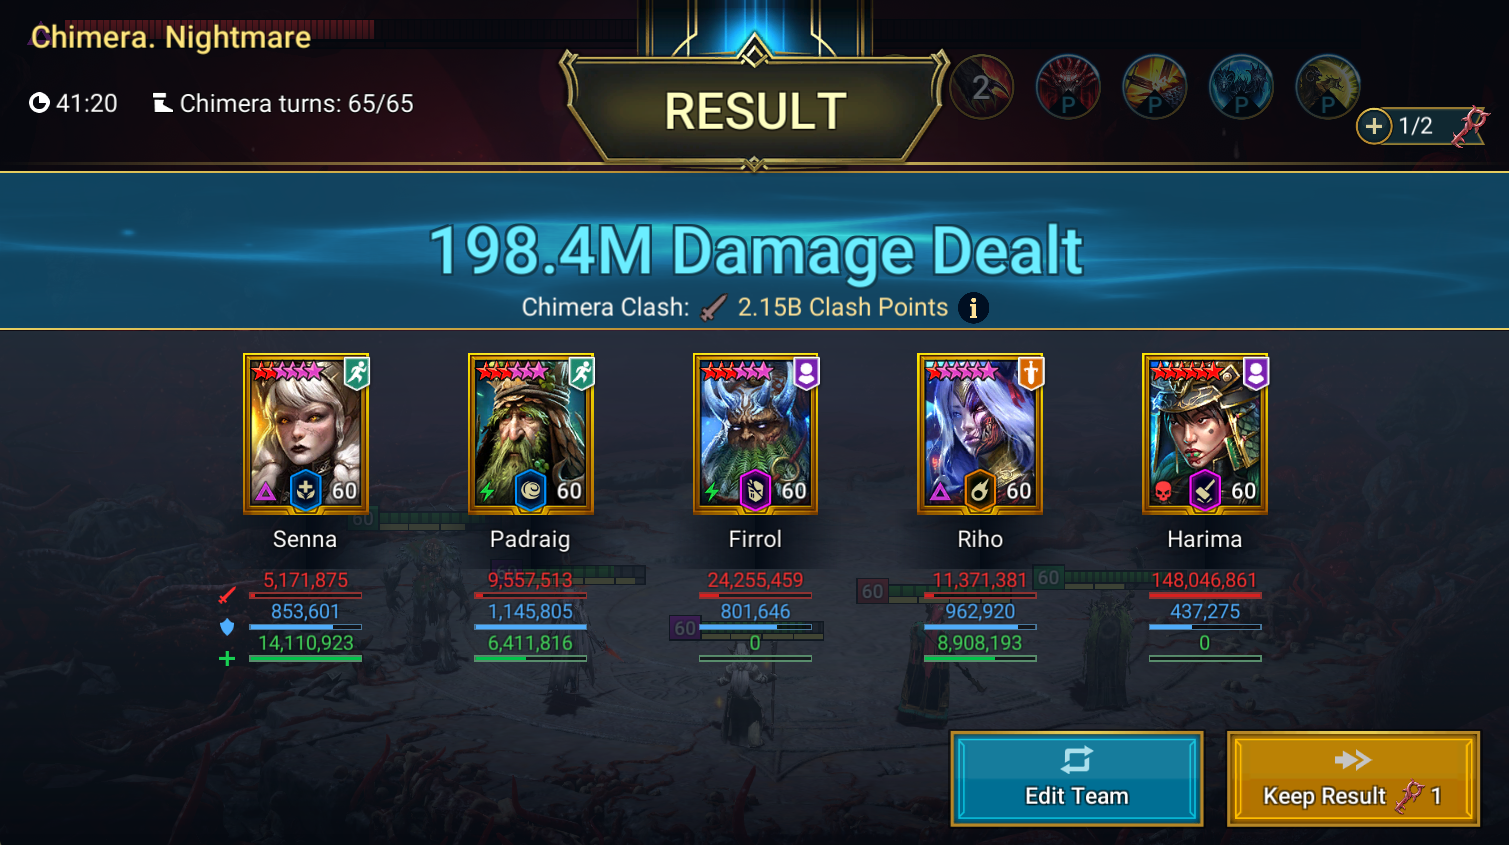
As shown in the screenshots above, this team easily surpasses the 1 key threshold for both Nightmare and Ultra Nightmare difficulties on full auto. My primary focus when building this team was to ensure it consistently achieves this benchmark, allowing me to shift my attention toward completing more trials. This not only unlocks additional damage multipliers but also improves overall rewards. Regardless of the difficulty, this team structure – a core of four support champions capable of countering each form’s mechanics, protecting the team, and completing trials – enables a dominant damage dealer to focus on taking down the boss.
You could also consider using Enemy Max HP champions like Gnut and Marius, who are currently some of the top performers for achieving high scores. Looking ahead, I’m focusing on champions that can help complete the first trial, which often acts as a gatekeeper to accessing subsequent ones. For now, I’ll continue using my standard team to consistently clear Ultra Nightmare, while experimenting with a trial focused team for Nightmare to see how many objectives we can tackle. Perhaps Sniktraak will find a spot in the line-up soon!
6 TRIALS COMPLETED:
- Place 6 unique debuffs on the Chimera within 5 of its turns while your Champions are under [Increase ACC] buffs. – Ram Form Easy Trial #2
- Damage the Chimera with a single skill while it is under 5 or more debuffs and your Champions are under [Increase DEF] buffs. Will not count damage from counterattacks. – Lion Form Easy Trial #1
- Damage the Chimera within 3 of its turns while your Champions are under 5 unique buffs. Will not count damage from skills that scale based on enemy MAX HP. – Lion Form Easy Trial #2
- Damage the Chimera while it is under [Decrease SPD] and [Decrease DEF] debuffs. Only counts damage from skills. – Lion Form Normal Trial #1
- Damage the Chimera with counterattacks and Ally Attack skills. – Lion Form Hard Trial #2
- Damage the Chimera within 3 of its turns while it is under a [Decrease SPD] debuff, and your Champions are under [Increase SPD] buffs. – Viper Form Easy Trial #3

Nice team, I’ve been playing for 3 years, and none of the champions are in my roster. :)